Get your machine ready
Today you install the few big apps a human has to click through, and your agent installs the quiet tools it needs to work. By the end, Claude Desktop (or Codex), Xcode, and Android Studio are on your Mac, and your agent can install and verify everything else without you hunting for scripts.
- Install Claude Desktop and sign in
- Choose the right AI plan for long build days
- Install Xcode and Android Studio the right way
- Give your agent a safe project folder
- Have your agent install and verify Homebrew, Node, Git and Expo
You install the big apps, and your agent sets up the rest.
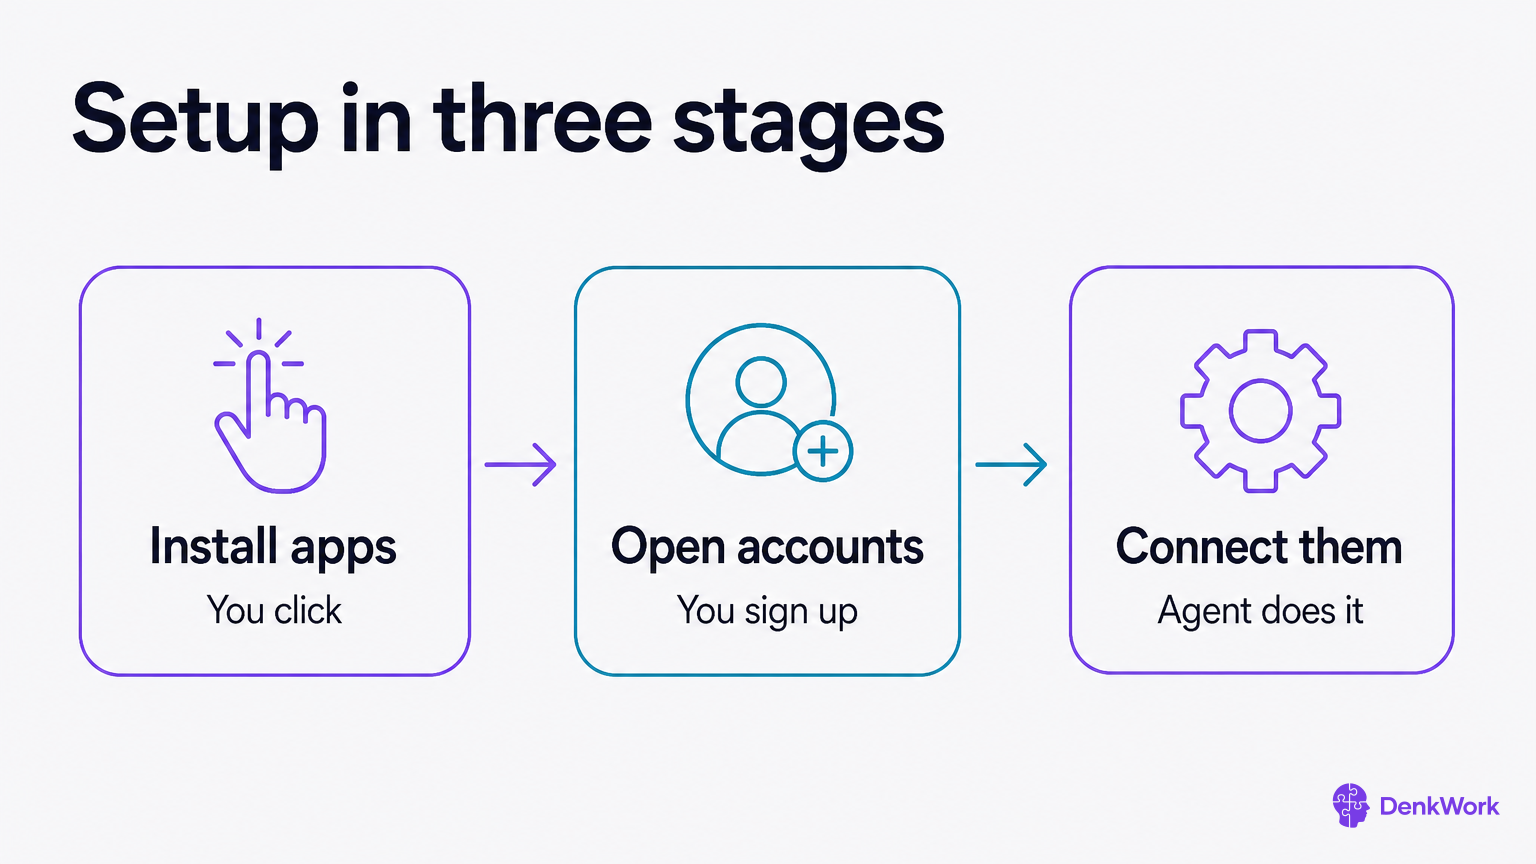
Setup splits three ways, so you always know who does which job. First: the apps you install on your computer, the ones that live in Applications, ask for your Apple ID, and need you to accept a licence. Second: the accounts you open with services on the web. Third: the connections that let your agent use those accounts for you.
This lesson is the first of those: the apps on your Mac and the trusted tools your agent will install. Think of it like a kitchen. You bring in the oven and the fridge yourself, because only you can sign for the delivery. Your agent stocks the pantry, labels the jars, and checks nothing has expired.
A simple rule keeps things safe. You install anything that needs your Apple ID, unlocks a permission box, or can see your whole disk. Your agent installs the developer tools inside a project folder you point it at, and it reports back on exactly what changed. That way, your files stay private and repeatable, and your agent still does the heavy lifting.
Install the phone store apps you plan to ship to, and nothing extra.
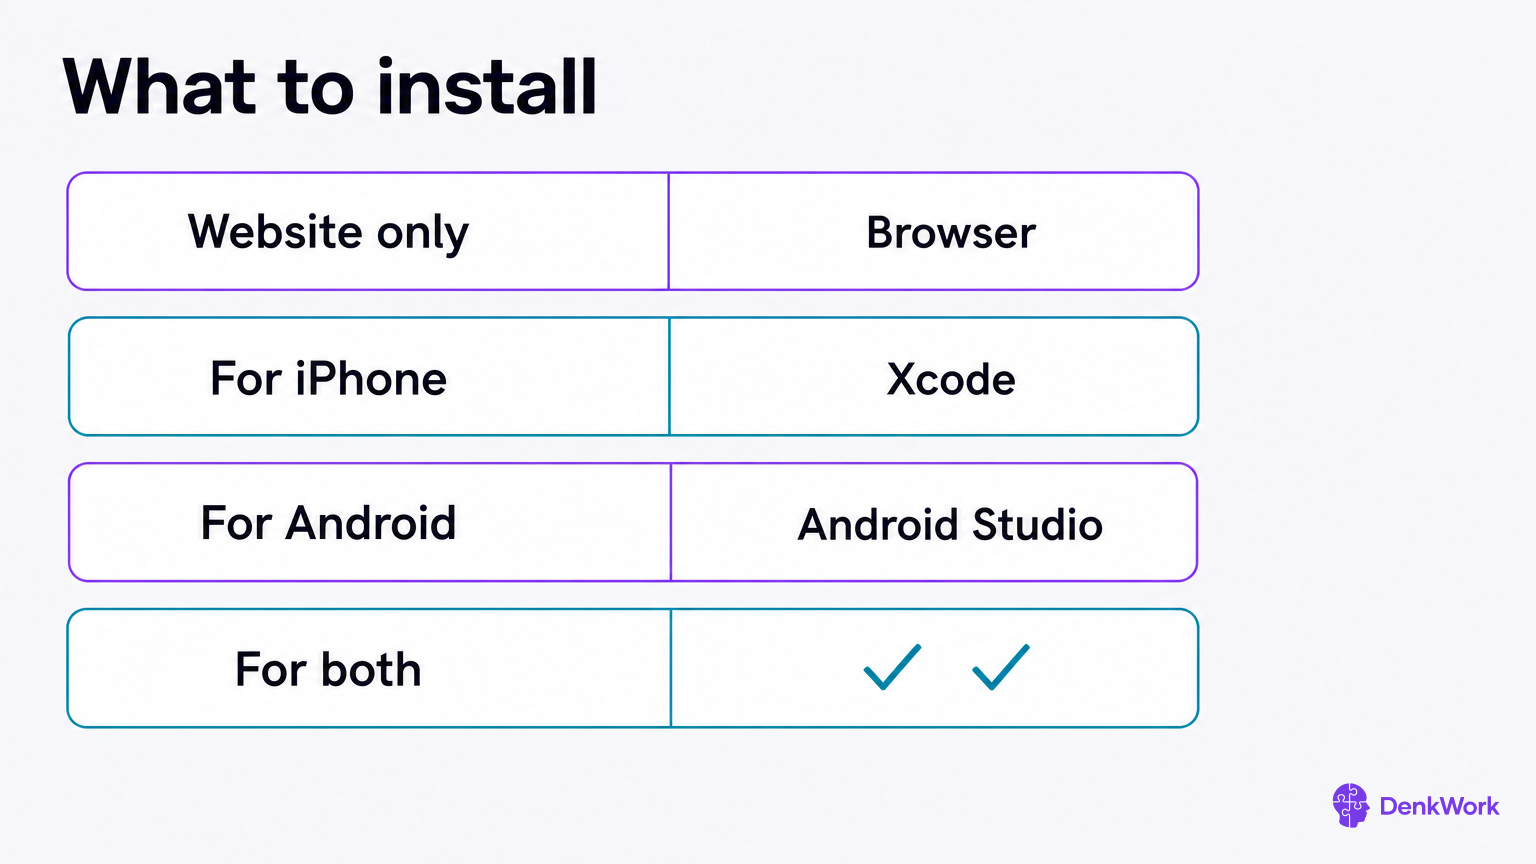
Lists are easier to trust when you see how they are decided. The install list comes from where your app will run:
- Building a website or web app only: a browser is enough. Chrome or Safari are fine, and you already have one. No extra install beyond your agent.
- Building for iPhone: Xcode. This is non-negotiable for shipping to the App Store.
- Building for Android: Android Studio. This is how Android tools arrive on your Mac.
- Building for both phones: both of the above.
On Windows: only a Mac can build an iPhone app. A Windows reader can ship to Android and rent a Mac in the cloud later for the iPhone build.
This course builds a mobile app for both phones, so you install both Xcode and Android Studio. There is also a small marketing website, which needs nothing extra because a browser covers it.
One payoff: today is the heaviest install day of the whole course, and it happens once. Later you will choose how your app gets onto a phone, and there is more than one good answer, but the choice does not change what you install today. Every route to the App Store goes through Xcode, and every route to Google Play goes through Android Studio.
Can I skip Android Studio if I only care about iPhone?
Yes, you can. If you are certain your first ship is iPhone-only, install Xcode now and add Android Studio later. This course shows both because most readers want both stores live by the end.
Bring in the app you talk to while you build.
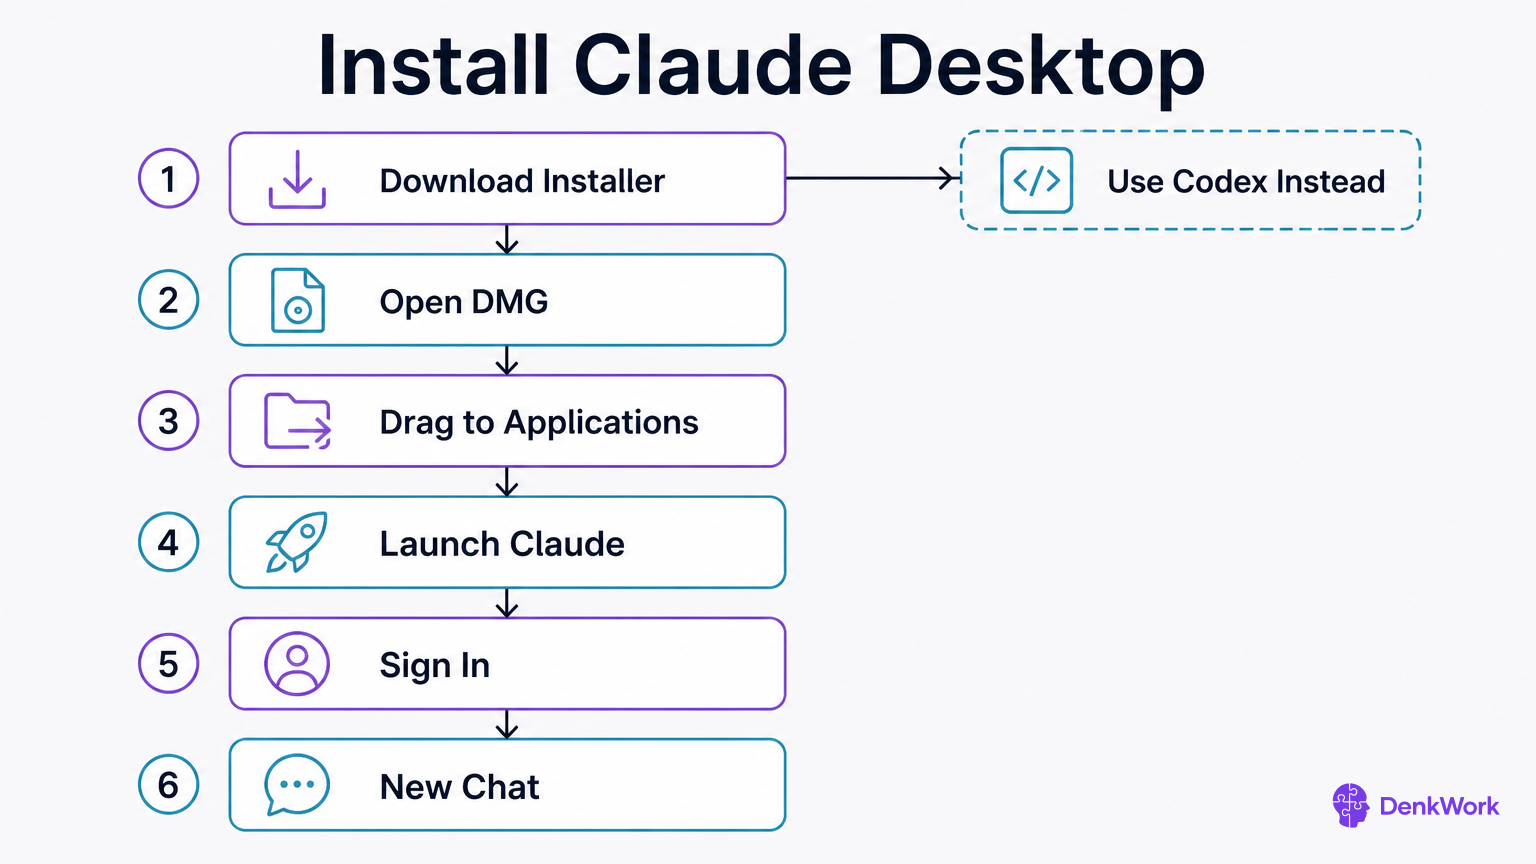
Claude Desktop is where you brief your coding agent and approve changes to your project. Installing it is like setting up your workbench before you bring in any tools.
Follow the steps below on your Mac. The result should be Claude Desktop in Applications, signed in, and ready to start a new chat.
Codex is the alternative, and it also runs on your desktop: it lives inside the ChatGPT desktop app, and it comes as a command tool and an editor extension too. Either agent can do everything in this course. We show Claude Desktop because it is the simplest thing to install if you have never used a terminal, and because every prompt in these lessons was written against it. If you already live in ChatGPT or VS Code, use Codex and read the prompts as written for whichever agent you have.
- 1
Download Claude Desktop for Mac
Open the download page and pick the macOS build. On an Apple Silicon Mac, take the Apple Silicon one.
Download Claude DesktopCheckThe Claude .dmg file finishes downloading.
- 2
Open the .dmg and install
Double-click the .dmg, then drag the Claude icon into Applications in the window that opens.
CheckClaude appears in your Applications folder.
- 3
Launch Claude Desktop
Open Applications and double-click Claude. macOS will ask to confirm opening an app downloaded from the internet; click Open.
CheckClaude launches to a sign-in screen or your chat list.
- 4
Sign in to Claude
Sign in with the same account used for your Claude subscription.
CheckYour name or account shows in the app, and you can start a new chat.
- 5
Start a new chat
Click New chat and send a short hello so you know it is responsive.
CheckYou see Claude reply within the app.
How do I know if my Mac is Apple Silicon?
Click the Apple menu, choose About This Mac, and look for Apple M1/M2/M3 in the chip line. If it says Intel, you have an Intel Mac and should use the Intel build.
Choose a plan that will not stop mid-build.
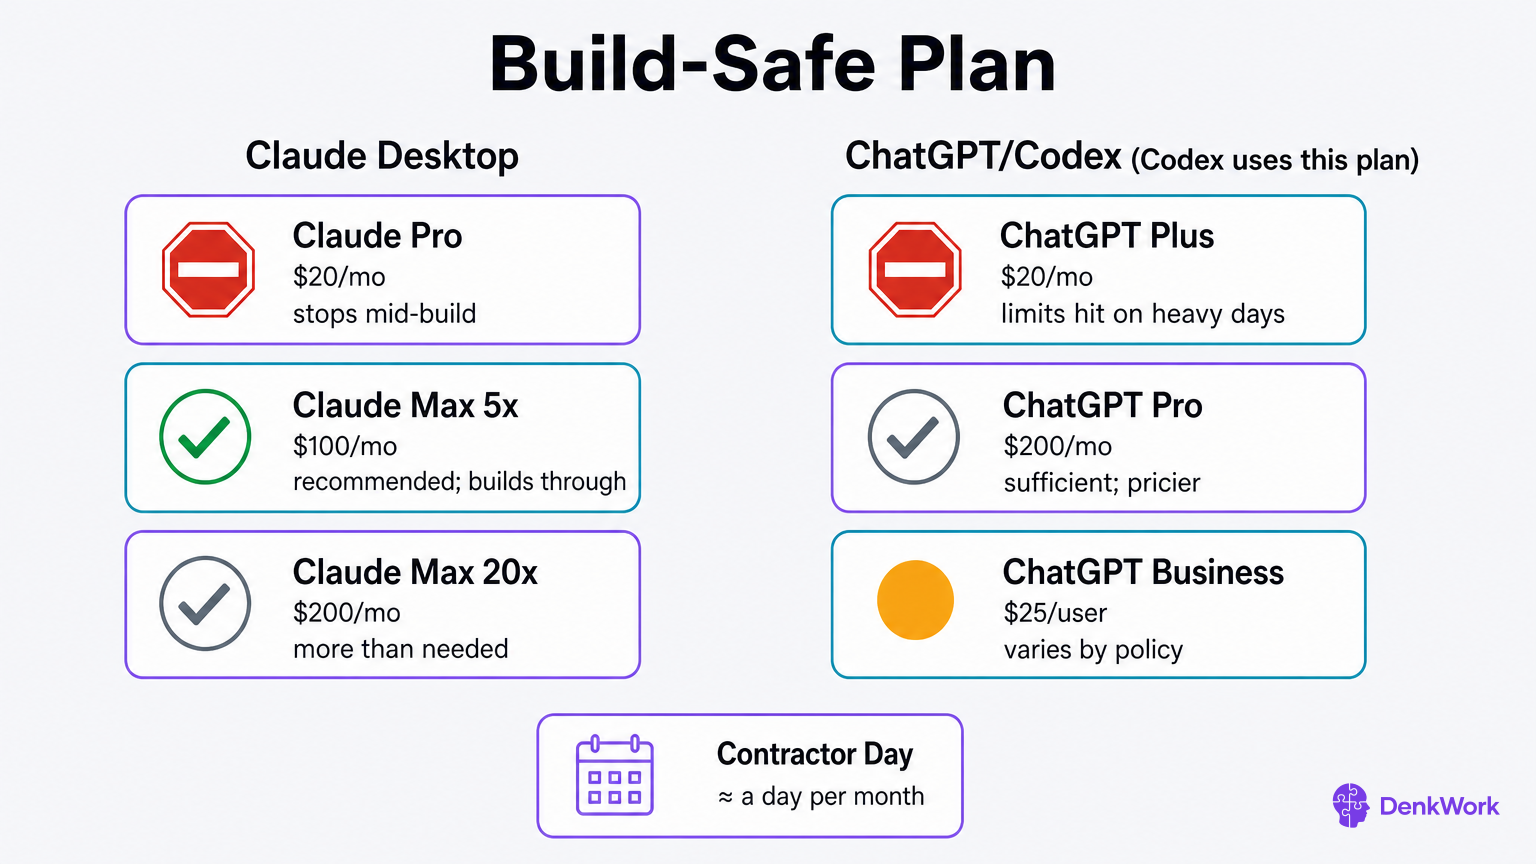
This is a real decision with real money on it. Picking the lowest tier can stop you at the worst time, halfway through wiring a screen, with a cooldown clock and no way to continue.
Claude Desktop plans: see Claude's pricing page. Pro at $20 a month is too little for this course. You will run out of capacity during a build session. Max 5x at $100 a month is the recommendation. Max 20x at $200 a month is more than this course needs, fine if you are already building full time.
Codex rides on your ChatGPT plan rather than being bought separately. See ChatGPT's pricing page. Plus is $20 a month, Pro is $200 a month, and Business is about $25 per person. Claude has a middle tier at $100; ChatGPT jumps from $20 to $200, so the choice there is starker. Anyone going the Codex route on Plus should expect to hit limits on a heavy day.
Why $100 a month makes sense: a subscription is not priced like the usage behind it. The same work billed through an API, token by token, often costs several times a flat subscription in a busy month. That gap is why a flat plan is the sensible way to buy today, and pricing like this may not last.
Frame it against the alternative. It is roughly a day of a contractor’s time per month, for something you will use daily for months.
Point your agent at one project folder, not your whole disk.
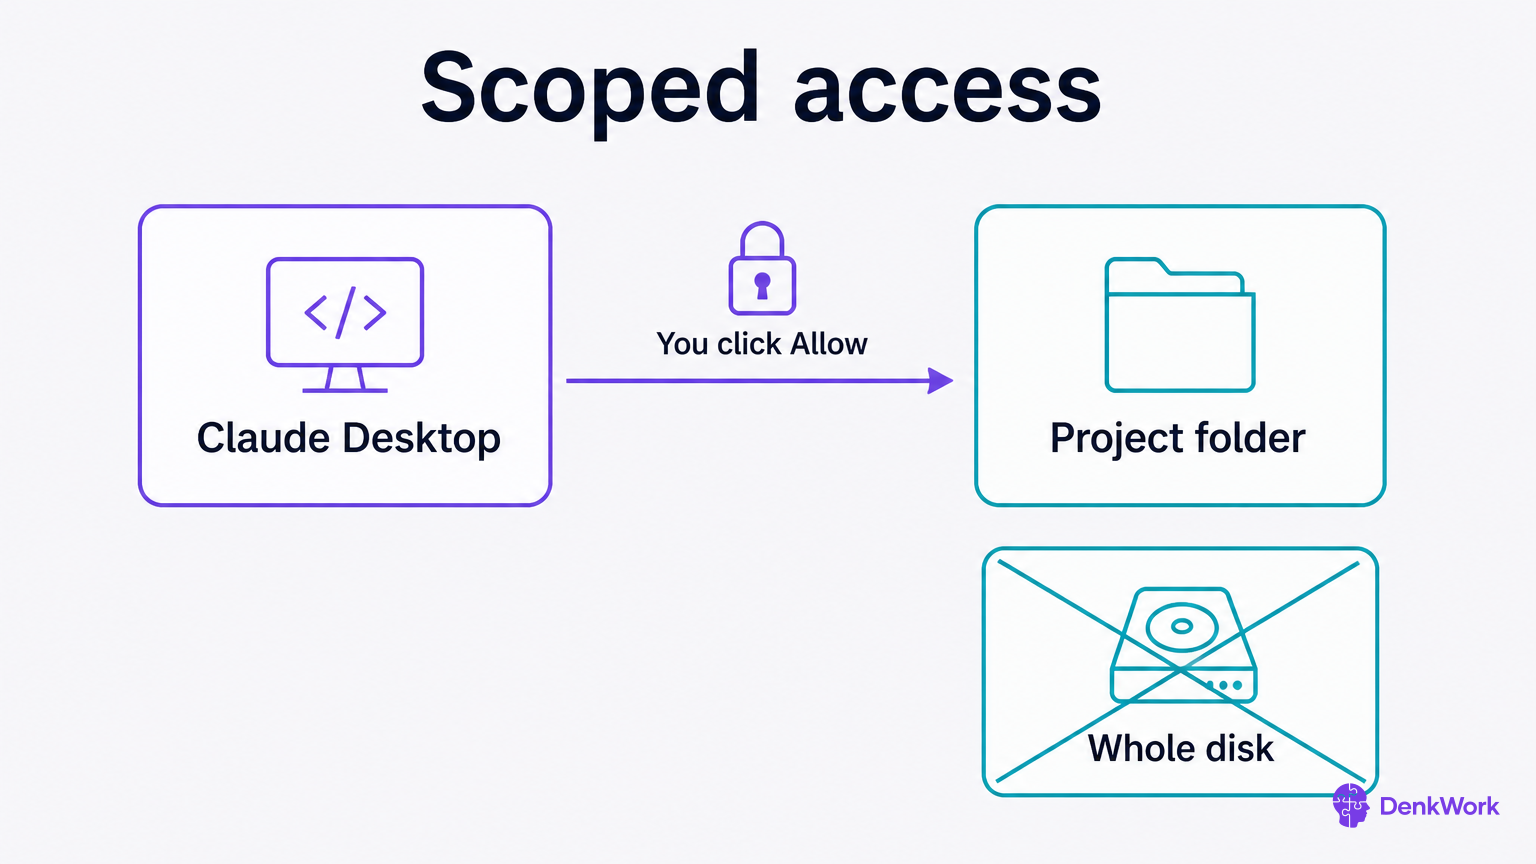
Your agent works inside a folder you choose, like a contractor who gets a key to the garage, not the whole house. That permission box is yours to click, and it is what lets the agent create files, install tools, and show you changes in one place.
Create a project folder now. Name it after your app idea. Keep it somewhere you can find easily, like Documents.
When your agent first tries to create files in that folder, macOS shows a permission box asking if the app can access it. Click OK. If it asks again later for a subfolder, allow that too. Do not grant access to your entire disk. Keeping it scoped makes audits and backups simpler.
From now on, any install your agent does will live under this folder or in standard system locations it explains first. You will approve before each change.
- 1
Create your project folder
Open Finder, go to Documents (or another spot you prefer), and create a new folder with your app’s name.
CheckYou can see the empty folder in Finder.
- 2
Open Claude Desktop to this folder
Start a new chat and tell Claude you will work inside that folder; when it asks to access or save files there, approve the macOS permission prompt.
CheckmacOS shows a permission box, and after you click OK, Claude can read and write files in that folder.
Tell me which folder you are working in right now, in plain English.
Then create a single file there called README.md containing the one line 'Ready to build.'
If macOS asks for permission, stop and tell me exactly what to click.
When you are done, confirm the file exists and show me what is in it.
Your agent already knows where it is working, so you never have to type a folder path.
What if I picked the wrong folder?
No problem. Create the correct one and tell Claude to switch work to it. If you already granted access to the wrong spot, you can revoke it later in System Settings under Privacy & Security, Files and Folders, and then approve the right one when asked.
Xcode is the Apple tool that builds and signs iPhone apps.
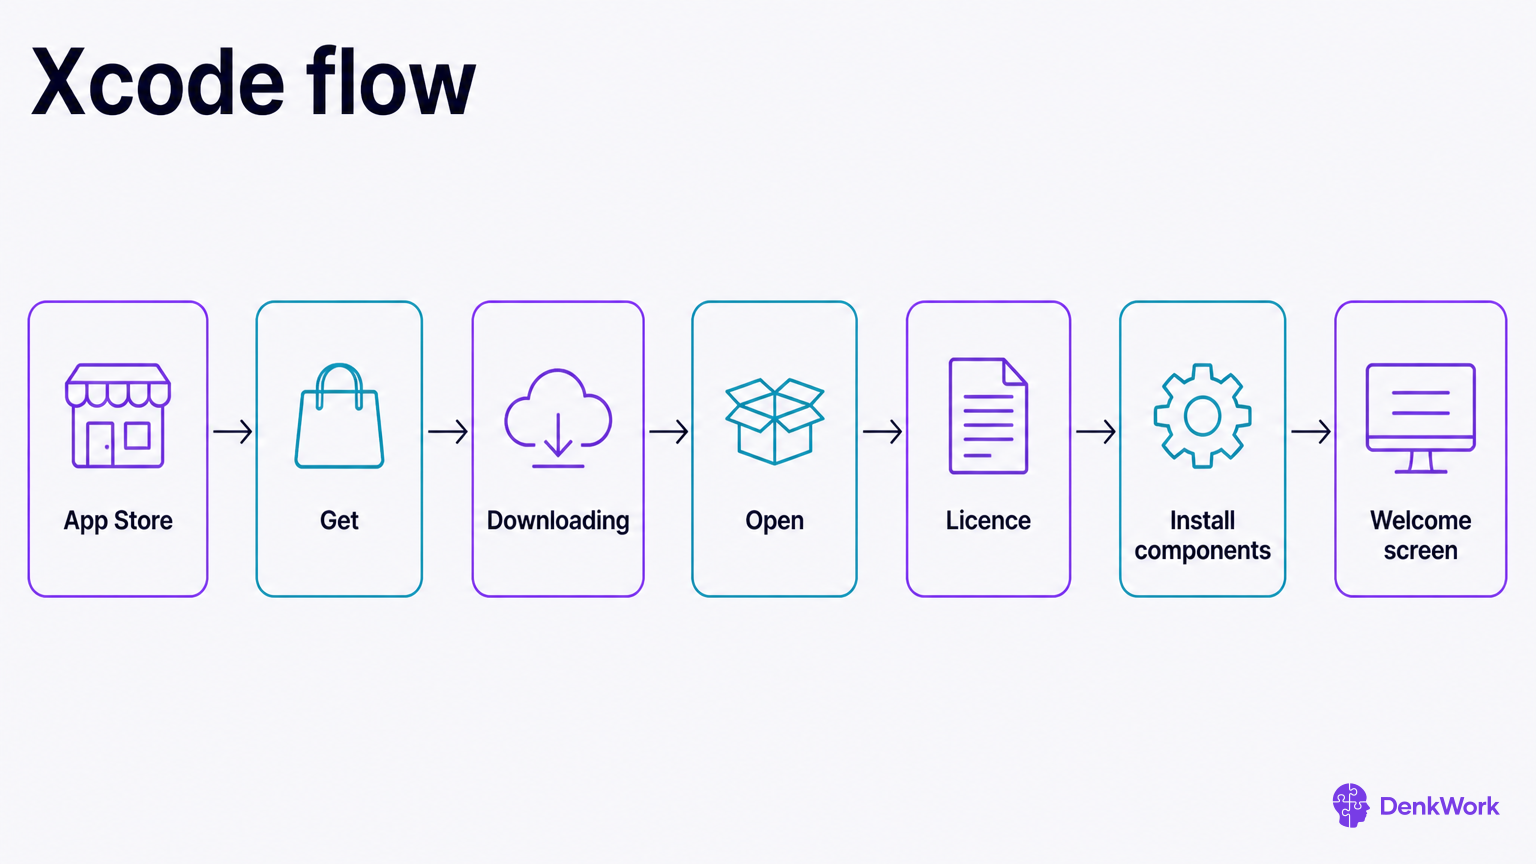
Xcode is the oven for iPhone builds. It comes through the Mac App Store, it is large, and it needs a first run to install extra pieces. The download can take a while, so start it now and keep reading.
You will install it, open it once, accept the licence, and let it install additional components when it asks. Your agent will verify the version after that.
- 1
Open Xcode in the App Store
Use the direct link below or search the App Store for “Xcode,” then click Get.
Get Xcode in the App StoreCheckThe App Store shows Xcode, and the download begins when you click Get.
- 2
Sign in if asked
Enter your Apple ID and password if the App Store asks.
CheckThe Xcode download continues.
- 3
Wait for the download
Xcode is many gigabytes. It can take an hour on a normal connection. Let it finish in the background.
CheckThe Get button turns into Open.
- 4
Open Xcode once
Click Open in the App Store, accept the licence, and approve installing additional components when prompted.
CheckXcode reaches its welcome window with no further prompts.
Confirm that Xcode and its command line tools are installed and working.
1) Check that the Xcode app exists in /Applications and tell me the version reported by the app.
2) Run 'xcodebuild -version' and paste the exact output.
If anything is missing, guide me through opening Xcode again to complete setup, then re-check.
Look for a specific version number and the xcodebuild output in full.
Android Studio is the Google tool that builds Android apps.
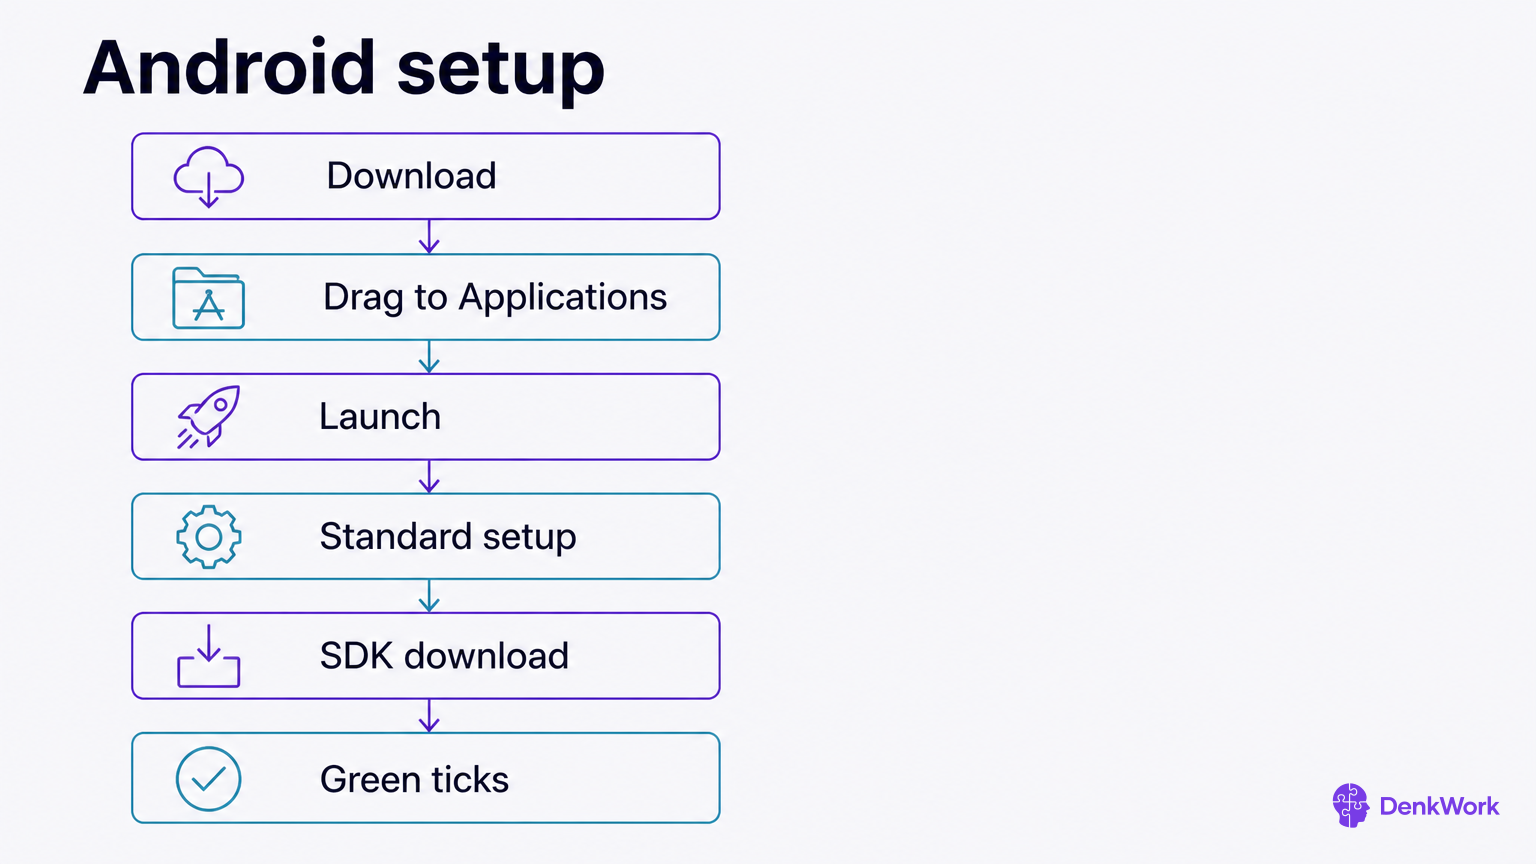
Android Studio brings in the Android SDK and build tools. It comes as a Mac download, installs into Applications, and guides you through a setup wizard. Take the Standard option unless you already know otherwise.
The SDK download can take a while. Let it run and watch for green ticks at the end.
- 1
Download Android Studio for Mac
Open the official page and download the macOS build that matches your chip.
Download Android StudioCheckThe Android Studio .dmg file finishes downloading.
- 2
Install Android Studio
Open the .dmg, then drag Android Studio into Applications.
CheckAndroid Studio appears in your Applications folder.
- 3
Launch Android Studio
Open Applications and double-click Android Studio.
CheckThe setup wizard starts.
- 4
Choose Standard setup
Select the Standard option in the wizard and continue.
CheckThe wizard proceeds to download the Android SDK.
- 5
Let the SDK download
Allow the wizard to download and install the SDK and tools it lists.
CheckThe final screen shows green ticks for the components.
Homebrew is the app store for developer tools on a Mac.
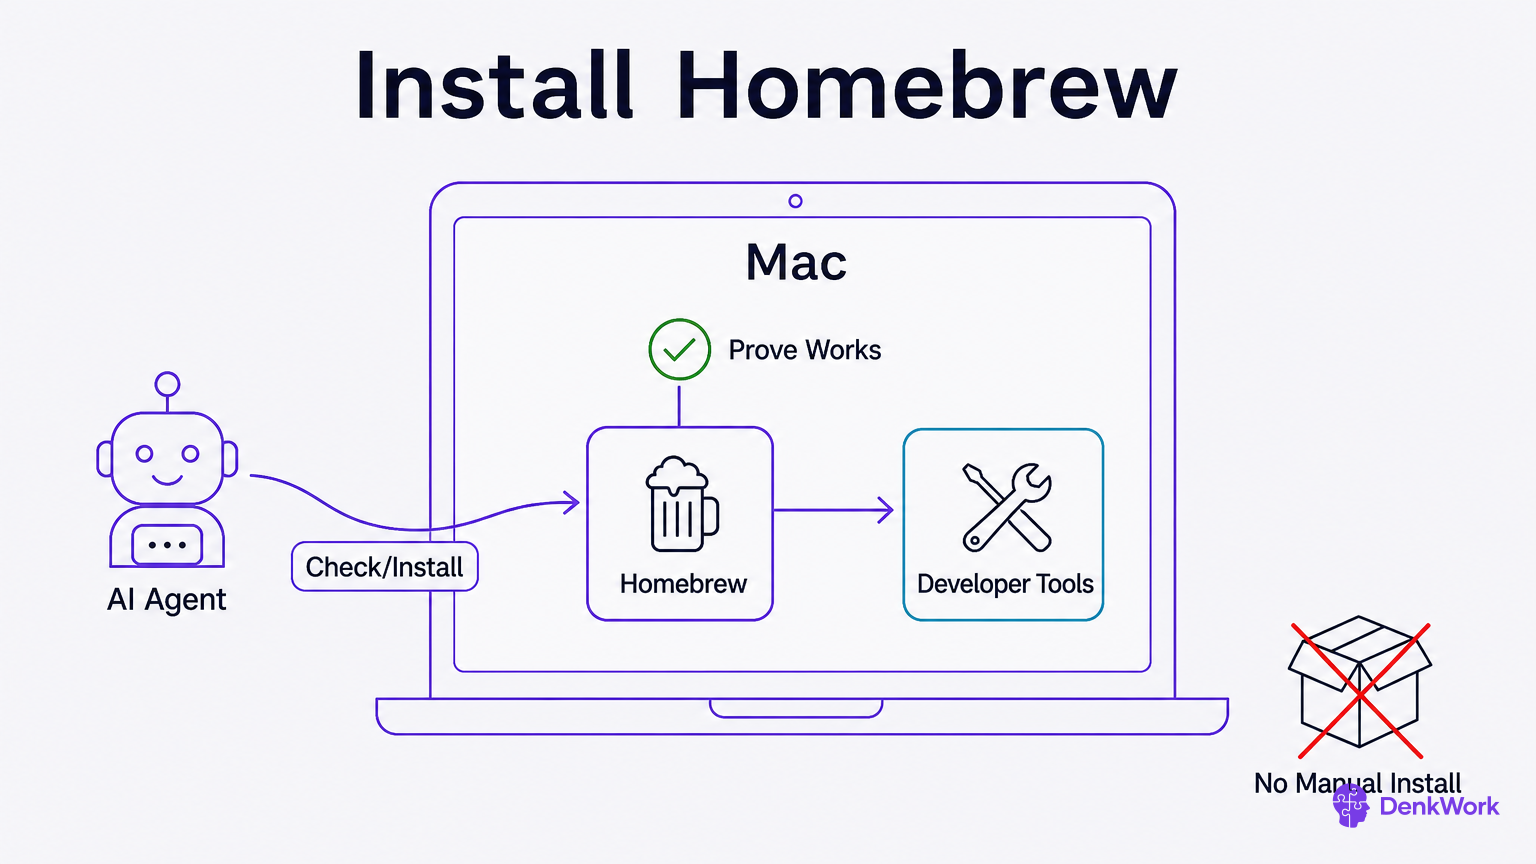
Homebrew is like a smart pantry: it fetches, labels, and updates the small tools your agent needs, all in known places. Your app needs it because many other tools ride in through it cleanly and can be checked later.
You do not run installers yourself. Ask your agent to install Homebrew, explain what it changes, and prove it works. If Homebrew is already present, your agent should confirm and move on.
Please install Homebrew on my Mac, or verify it if already present.
Constraints:
- Explain each change before you make it.
- Do not modify my shell config beyond what Homebrew needs; show any line you add first.
- Install to the standard location for my chip.
After installing, run 'brew --version' and tell me the version in plain English. If installation fails, stop and explain the error and next steps.
Look for the version string and a short list of changes made.
Why not download every tool by hand?
Because Homebrew tracks what is installed and where, and can update or remove it safely. Hand-installed tools scatter across your disk and are easy to forget or duplicate.
Node runs the scripts that build and test your app.
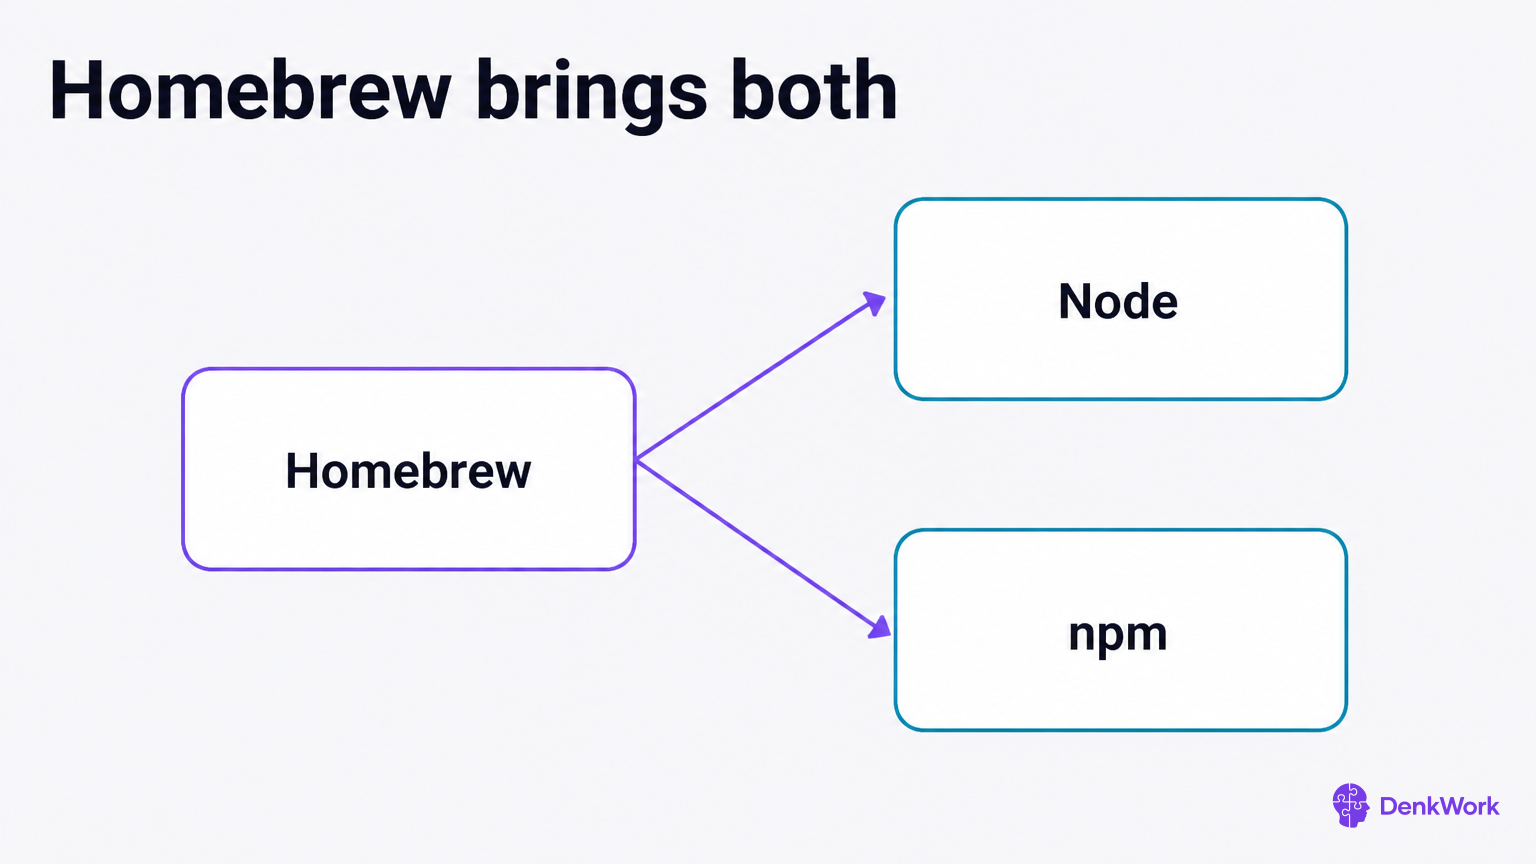
Node is the engine that runs the build tools your app needs. npm comes with it, and npm is the part that fetches add-ons other people have written. Think of Node as the stovetop and npm as the shopping trip.
You installed Homebrew a moment ago, and Homebrew can install Node. That is the simplest path and it keeps everything in one place, so that is what to ask for.
There is a longer story here. Some projects need different versions of Node, and there are tools whose whole job is switching between them. You do not need one today, and you will know if you ever do, because something will complain about a version. Let your agent make the call and say why.
Ask it to confirm both Node and npm are working before moving on.
Install Node on this Mac so I can build and run app tooling.
I already have Homebrew, so use that unless you have a specific reason not to. If you pick a different route, tell me what it is and why in one sentence.
Before you change anything, tell me what you are about to install and where it goes.
When you are done, confirm Node and npm both work and tell me the versions in plain English. If either is missing, fix it and explain what you did.
Expect to see the manager name, what it changed, and two version numbers.
What is a version manager, and do I need one?
A version manager is a tool that keeps several versions of Node on one machine and switches between them per project. It matters when you are maintaining a few different apps that were each built against a different version.
You have one app. Homebrew's Node is fine. If a project ever refuses to start and the error mentions a Node version, that is the moment to ask your agent to set one up, and it takes a few minutes.
Git saves snapshots of your work as you go.
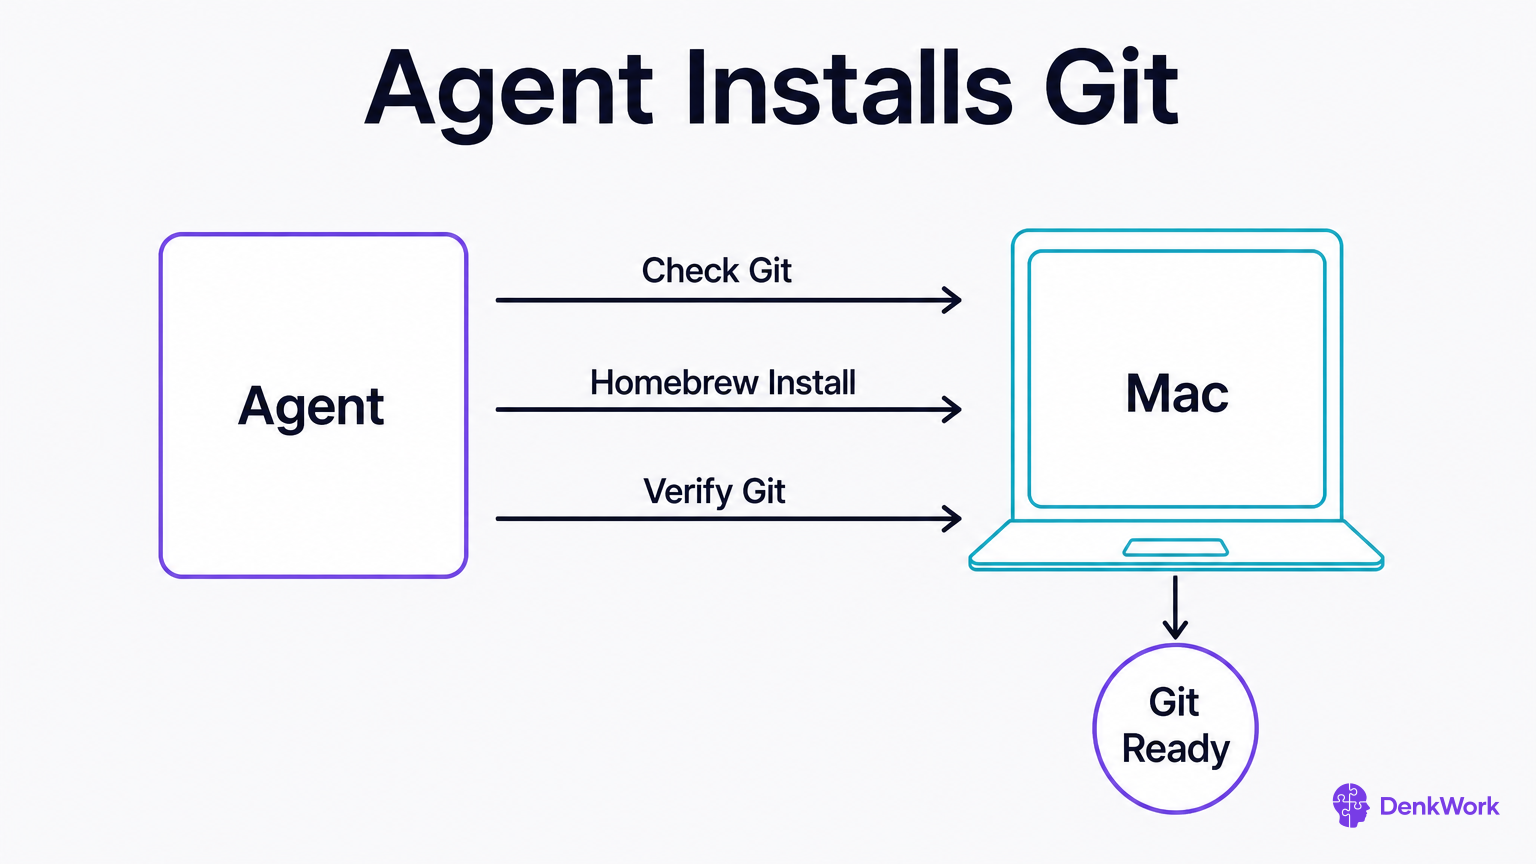
Git is a time machine for your files. It can take a snapshot, let you try a change, and return you to the snapshot if needed. You will use it to save your progress locally and, later, to share with GitHub.
Many Macs have a basic Git already present. Your agent will check, install or upgrade through Homebrew if needed, and verify the result. No need to learn Git’s commands today; saving snapshots comes later.
Check whether Git is installed and recent. If it is missing or outdated, install or upgrade it via Homebrew.
Afterward, run 'git --version' and tell me the version in plain English.
Do not change my global Git name or email yet; that comes when we connect to GitHub.
Look for the version string and whether Homebrew installed or updated Git.
Rules you write in a file are followed every session, without you asking again.
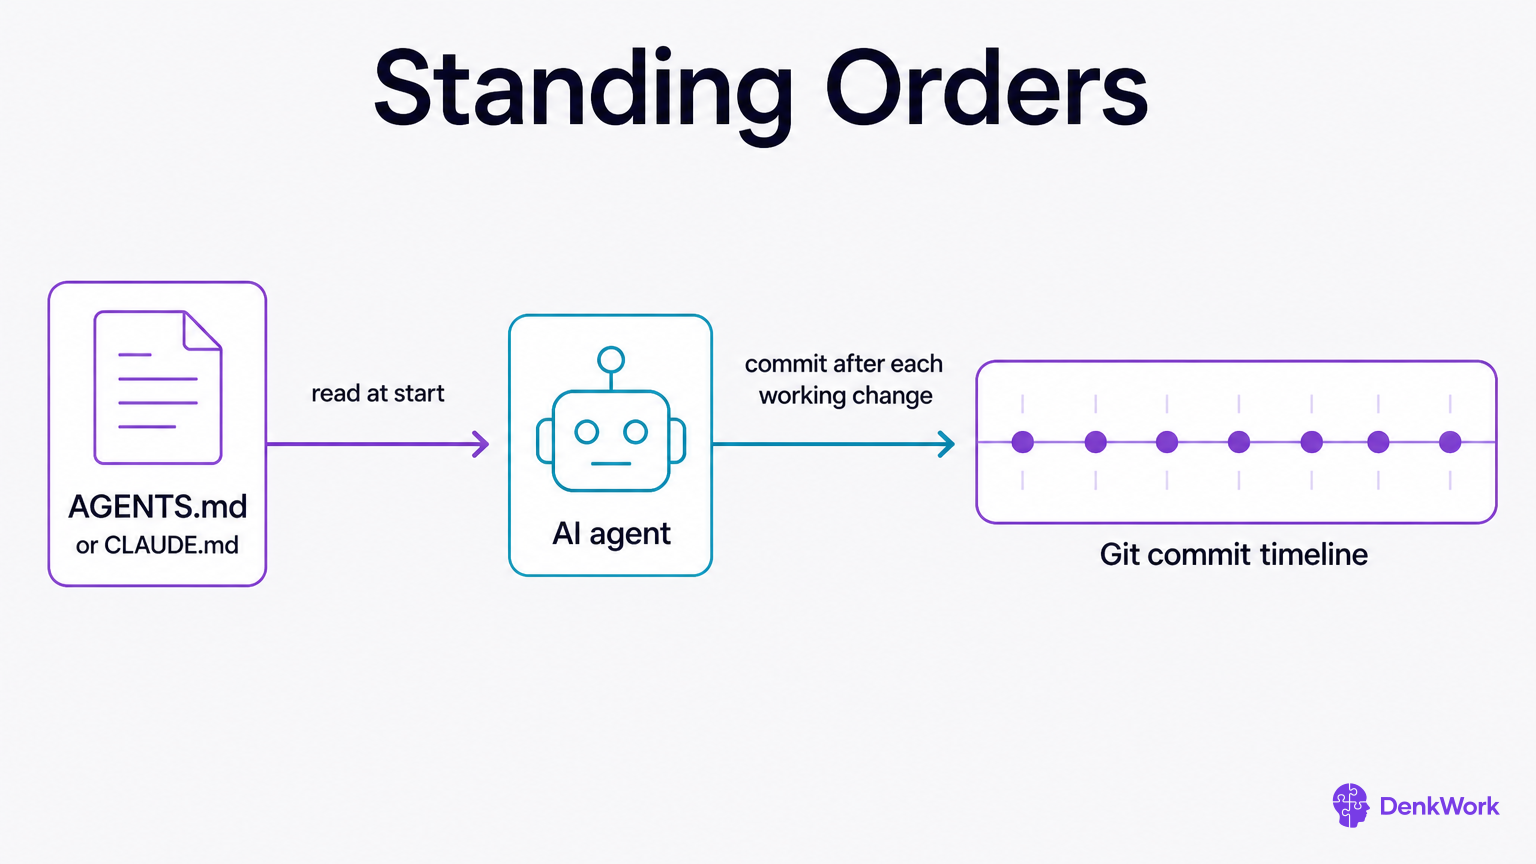
Your agent forgets a conversation. It does not forget a file. Now that it has a folder to work in and Git on the machine, you can write down how you want it to work, and it will read that before it starts, every time, without you asking.
Most agents look for a file called AGENTS.md or CLAUDE.md in your project. Think of it as the note you leave for someone working in your house while you are out.
The single most valuable rule to put in it today is about saving your work. Ask the agent to commit after every change that works, with a message saying what changed. A commit is a labelled snapshot of the whole project, and a project with frequent commits can be wound back to any of them.
Two more earn their place on day one. Have it find where something lives before it changes it, and have it stick to the one job you asked for. Both are habits you would otherwise be typing into every conversation for the rest of the course.
This is the difference between a bad afternoon and a lost one. When something breaks in an hour's time, and it will, the question is how far back the last good state is. With commits after each working change, the answer is minutes. Without them, the answer is however long ago you last remembered to save something, which is usually this morning.
Module 3 covers what commits actually are and how to read your own history. Today you are only making sure they happen.
- 1
Ask your agent to create the standing orders file.
Paste the prompt below in your project folder. It writes the file and shows you what went in.
CheckYou can open the file and read the rules in plain English.
- 2
Read it and change anything you disagree with.
It is your file. If a rule is wrong for you, edit it or tell the agent to.
CheckEvery line in the file is something you actually want.
Save your standing rules in a file called AGENTS.md in this project, so I never have to paste them again. Include the ground rules I gave you earlier, plus the ones below.

Put these in it, in plain English:
- I am not a developer. Explain what you are doing in ordinary words, and define any technical term the first time you use it.
- When I ask for a change, first find where it is handled and report back without changing anything. I will tell you to go ahead once I have read it.
- Before changing anything, tell me what you plan to change and wait for me to approve.
- Do one thing at a time. If you notice other problems, list them for me instead of fixing them.
- After every change that works, commit it with a short message saying what changed and why. Never leave working code uncommitted.
- If something fails, stop and explain. Do not pile more changes on top of a broken state.
- Never put passwords or keys in files that go to GitHub.

If this project is not a git repository yet, set one up first and tell me what you did. Then show me the finished file and confirm you will follow it from now on.
Read it back before approving. These rules bind every session from here on.
Where does everything go, then?
Three different kinds of thing, three different homes, and it is worth getting them straight now because mixing them up is how secrets end up somewhere public.
Passwords go in your password manager. That is what it is for. Your agent never stores one, and a file listing which accounts you opened is a chore to maintain and out of date within a week.
Keys and secrets go in a file called .env, which lives in your project and never leaves your machine. That is the long string a service gives you so your app can talk to it. Setting those up is the whole of “Connect your accounts to your agent”, so there is nothing to do about them today.
Decisions go in the file you just wrote. The things your agent cannot look up: which plan you are on and what it costs, which sign-in you used, which region you picked. Add them under a heading as they happen, not in advance.
Expo is the tool that creates and runs a React Native app on your phone.
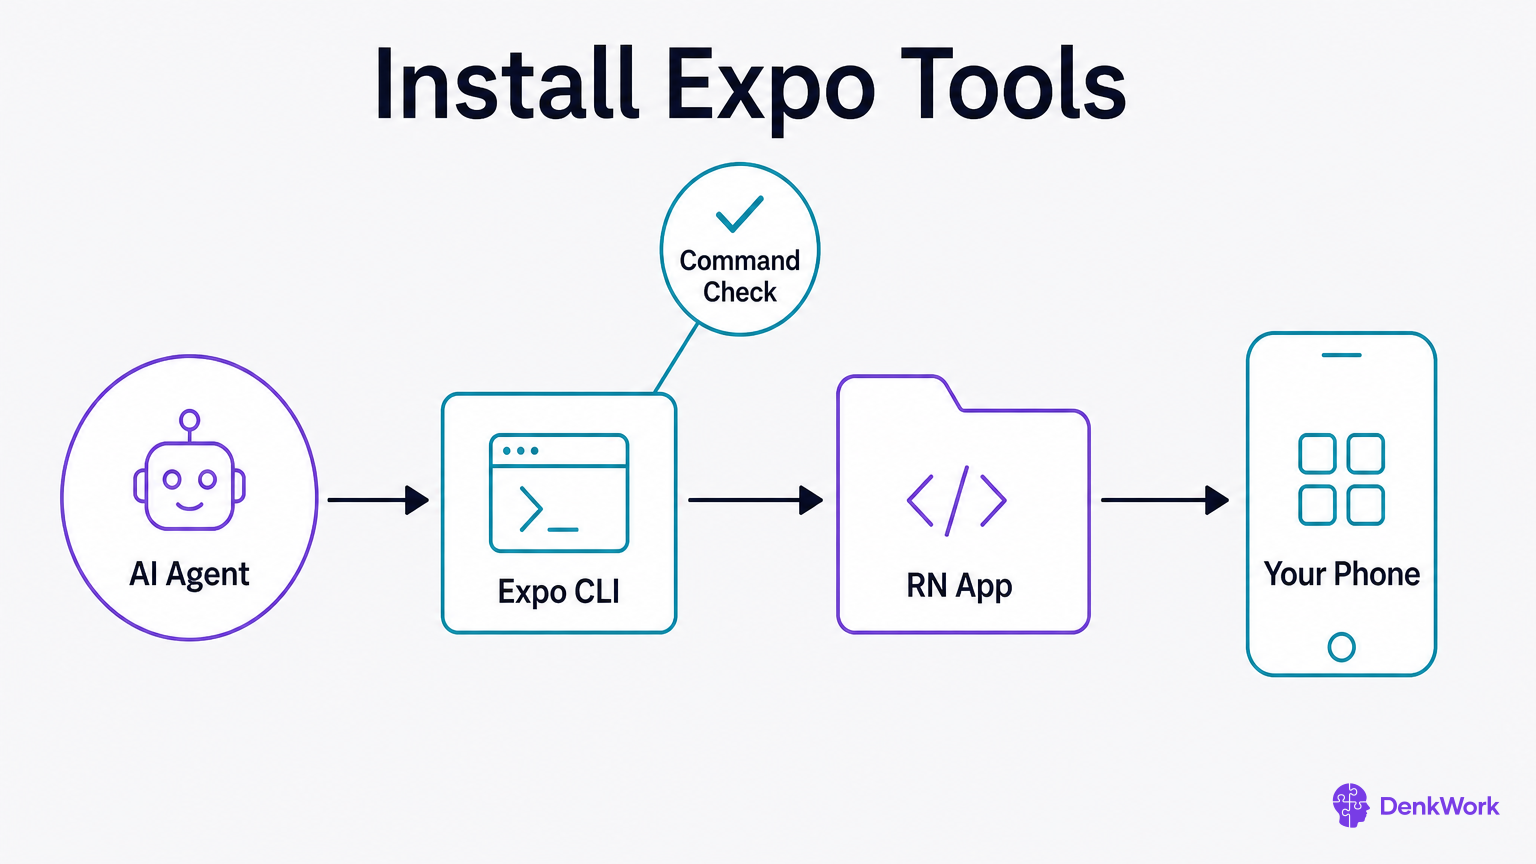
Only do this section if you are building with React Native, which is what this course uses and what the next modules assume. If you already know you are taking a different route to the app stores, skip it: your agent installs that route's tools when you get there, and nothing else from today changes. You choose properly in the next module, and installing Expo now costs you nothing if you switch.
Expo is the set of tools that creates a new React Native app, starts it on your phone, and refreshes it while you edit. Picture a director calling action, then keeping the scene in sync while you move the lights around.
Your agent installs the Expo command so it can create and run projects from your folder, then checks the command actually works. There is more than one way to install it, so let the agent pick and explain.
Make the Expo command available on this Mac so I can run Expo from any project folder.
- If a global install is appropriate, do that; if 'npx expo' is the recommended path, set things up so that works reliably. Explain your choice.
- Show me any packages you install and where.
- At the end, run 'expo --version' (or, if using npx, run 'npx expo --version') and tell me the version in plain English.
If an older Expo is present, update it and confirm the new version.
Expect a clear statement of how to invoke Expo and the version reported.
Say what you want to do, not which package to use.
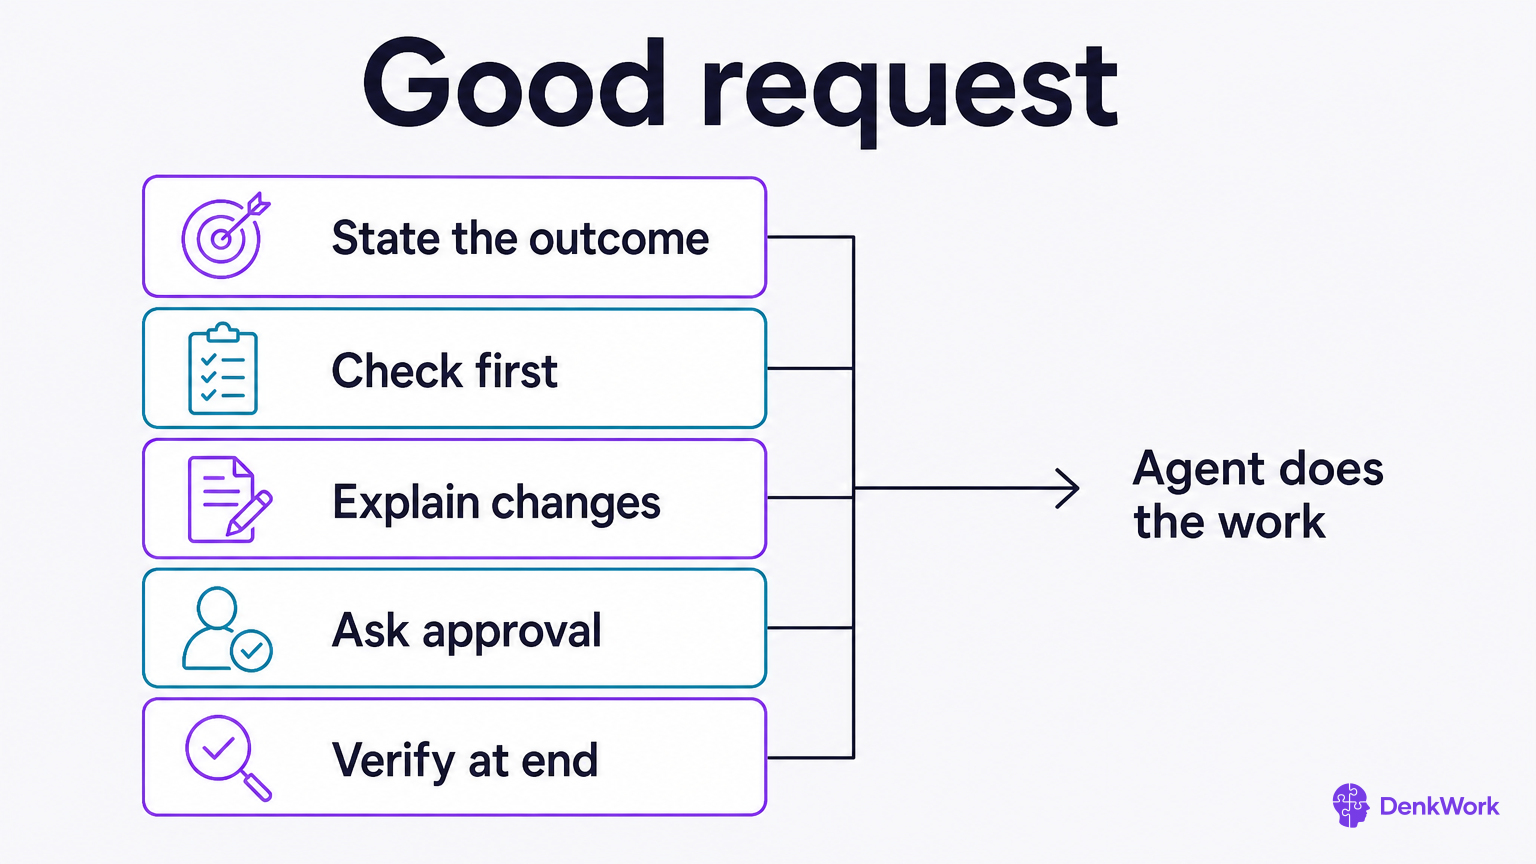
Any time you need another tool later, focus on the outcome. “I want to compress images in my build” beats “install X.” You are hiring a helper, not ordering a part number.
A good install request has a shape:
- Say what you want to be able to do and where (in this project folder).
- Say you are not a developer and need plain language.
- Ask the agent to check what is already there first.
- Ask it to explain as it goes, and to show changes before making them.
- Ask it to verify at the end with a short, human check.
- Tell it to stop and explain rather than push on if something fails.
That set of asks prevents silent changes and gives you proof it worked.
I want to [describe the outcome, e.g., "optimize images in my React Native app during builds"] in this project folder: [path or folder attached].
Please:
1) Check what I already have that could satisfy this.
2) Propose the tool(s) you recommend, in one or two sentences each.
3) Explain any changes before you make them, and show me the exact lines you will add or files you will create.
4) Proceed only after I approve each change.
5) At the end, verify with a short test and report the result to me in plain English.
If anything fails, stop and explain what happened and the options.
You should see a plan, a pause for approval, then a test result.
Why insist on verification every time?
Because installs can appear to succeed while nothing actually works. A short, visible check,printing a version, running a sample task,catches that early and gives you a receipt you can show a teammate later.
Paste the whole error back at the agent and say what you tried.
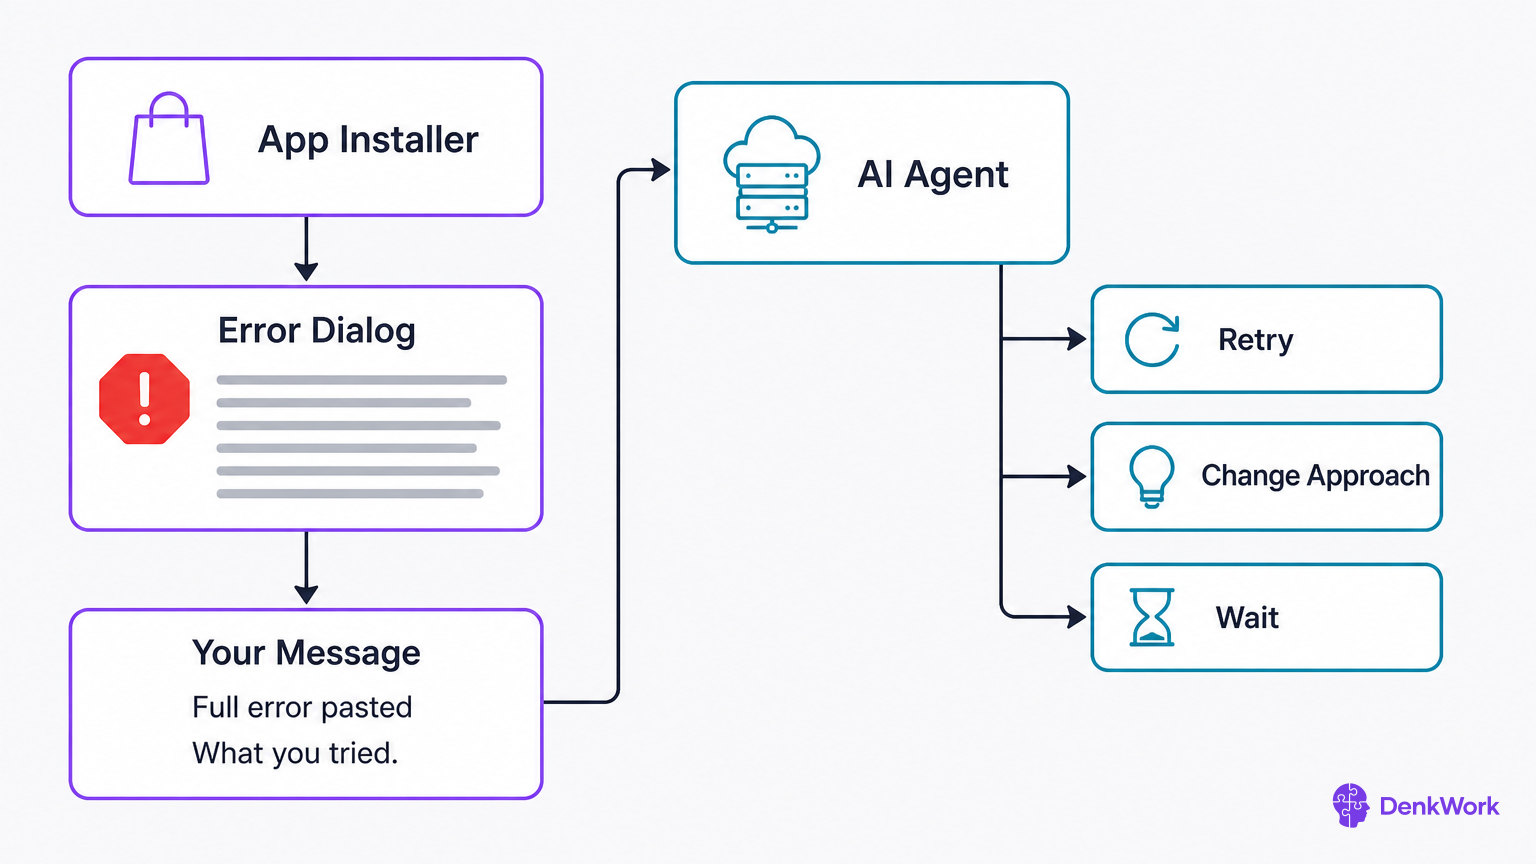
Failure is part of setup. An install can hang, a permission can be missing, or a download can be blocked by a corporate network. Your move is not to poke around menus. Your move is to tell the agent what happened, with the full error, and ask for a plan.
Short, vague messages make bad help. Full errors make good help. Include screenshots if the app shows a dialog with a red stop sign. Say exactly which step you were on and what button you clicked.
Then let the agent decide: retry, change approach, or wait. If the failure is on a provider’s side, like a temporary outage, your agent will tell you to pause. If it is on your machine, it will ask you for the one or two permission clicks only you can do.
The install failed at this step: [describe the step, e.g., 'installing Homebrew'].
Here is the full error or screenshot: [paste or attach].
This is what I already tried: [say what you clicked or retried].
Please:
- Explain in plain language what likely went wrong.
- Propose the next best step, and say what I need to click if anything.
- If we should gather more info, do that and show me what you found before changing anything.
Look for a clear diagnosis and a next action you can take.