Connect your accounts to your agent
Part three of setup: you installed the tools, you opened the accounts, and now you hand your agent the keys so it can act for you. Only GitHub and Supabase need doing today. Each section below says at the top whether it is needed now, can wait for a later module, or is optional, so you can stop whenever you like and come back.
- Sign your agent in to GitHub, Vercel, Supabase and Expo through a browser window it opens
- Create and store API keys for Resend and Stripe in a safe place
- Pair Modal with a token so heavy jobs can run off your laptop
- Install CodeRabbit on your GitHub repo without involving the agent
- Prove that secrets live in .env and are kept out of GitHub
Let your agent sign in to GitHub so it can save and review your code.
Connect this now. Your agent saves your work through GitHub from the next module onward, so this is the one connection everything else leans on.
GitHub is where your code lives. When your agent is signed in, it can create a repository, push changes, open pull requests, read comments, reply, and merge when you say so. That is the whole loop you will use later: draft, review, fix, ship.
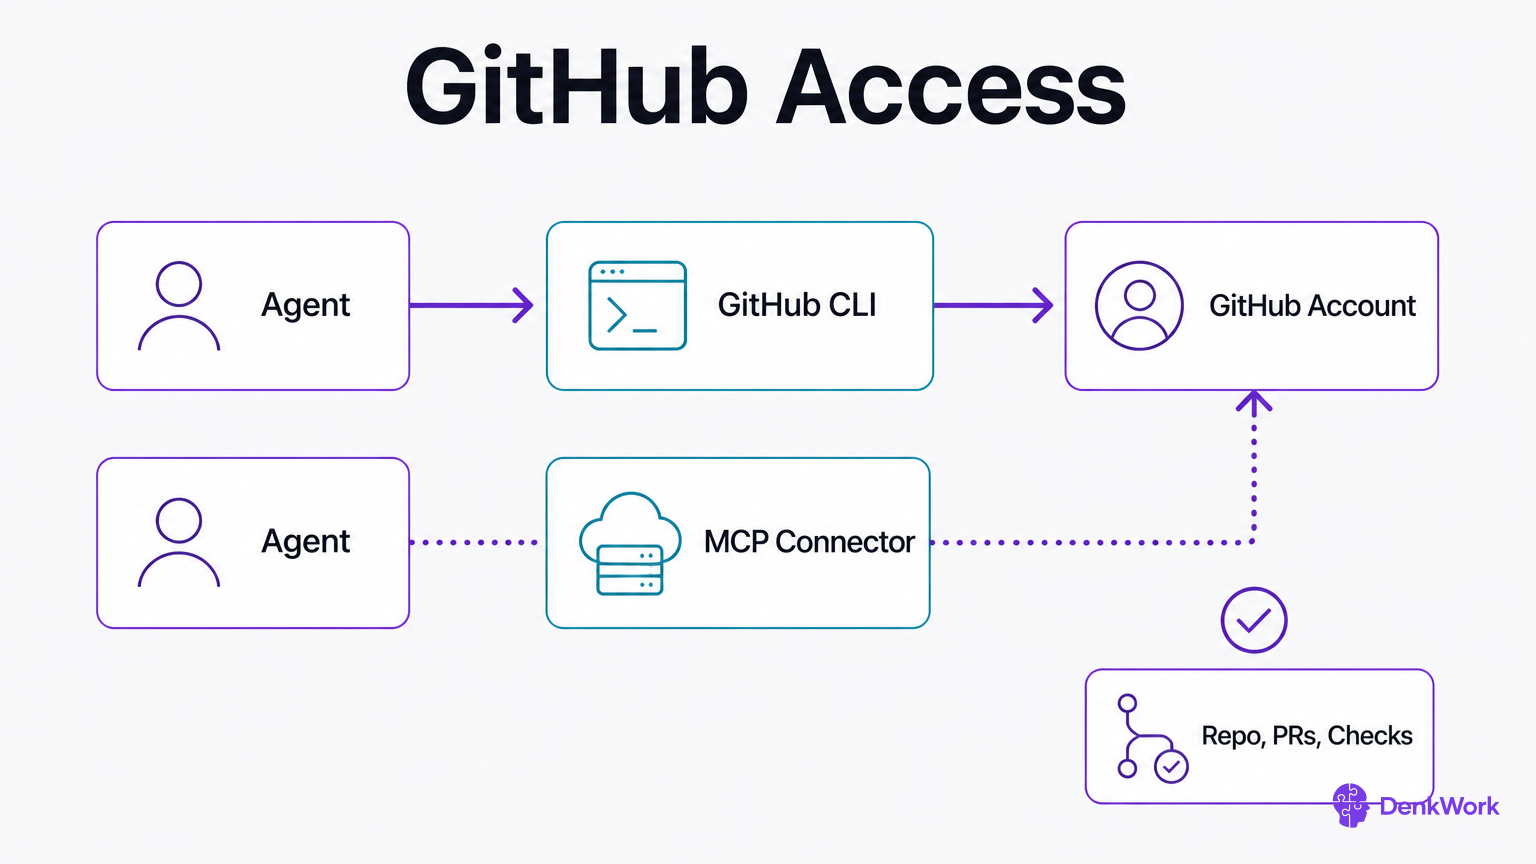
Two routes show up today, and they work together. A command line tool is something the agent runs to do work. An MCP connector is something the agent talks to for extra read and write powers inside a service. Prefer the tool; add the connector when it exists.
Ask for enough access to do the job end to end. Tight scopes sound careful, but they trap you in repeat approvals. Safety here comes from three things: this is your personal account and your own private repos, the agent shows you what it will change before it changes it, and every change is versioned so you can undo mistakes.
Use a personal GitHub account for this course. If a work login wall appears in the approval tab, sign out there and sign back in with your personal account.
- 1
- 2
Copy the one-time code, then open the link.
The code is in the agent's message and looks like four characters, a dash, four more. Copy it before you leave, paste it into the page that opens, and continue.
GitHub device loginCheckGitHub accepts the code and shows you what access is being requested.
- 3
Authorize the access, on your personal account.
Check which account you are signed in as before you approve. If a work login appears, sign out there and sign back in with your personal one.
CheckYou see a success page, and the agent reports the username it is now signed in as.
- 4
Add the GitHub MCP connector when asked.
If the agent opens docs, confirm and let it finish adding the connector.
GitHub MCP serverCheckThe agent confirms the connector is added or explains what it needs.
Install the GitHub CLI (gh) if it is not already installed. Then sign me in by running `gh auth login` using the browser flow.
Show me the one-time code it prints and the address to open, and wait while I do that part.
Request access that lets you work end to end on my repositories: create new repos, push branches, open pull requests, read pull requests, comment, and merge, and read whether checks passed. This is my personal account, not a work account.
When I approve in the browser, tell me which GitHub account you are now signed in as.
Then add the official GitHub MCP server from https://github.com/github/github-mcp-server so you can read and work with issues and pull requests via MCP. Tell me if that connector needs any extra approval or tokens from me, and guide me to provide them safely.
You are waiting for a one-time code first, and a confirmed account name second.
CLI vs MCP: which does what?
The CLI is the workhorse. It can create repositories, push branches, open pull requests, and merge. Think of it as the hands on the keyboard for GitHub tasks. The MCP connector is an extra channel the agent can use to list, read and sometimes update items like issues or pull requests without scripting those actions itself.
Use both when available. If the connector misbehaves or is missing a feature, the CLI still gets the work done. If the CLI needs complex parsing, the connector’s structured responses can be simpler to reason about.
Let your agent sign in to Vercel so it can put your website online.
You can leave this until module 6, when you put your website online. Doing it now costs a few minutes and saves interrupting yourself later.
Vercel is where the marketing site will live. When your agent is signed in, it can create a project, link it to your GitHub repository, set environment variables, and trigger a deploy. Later, you will point a domain at it.
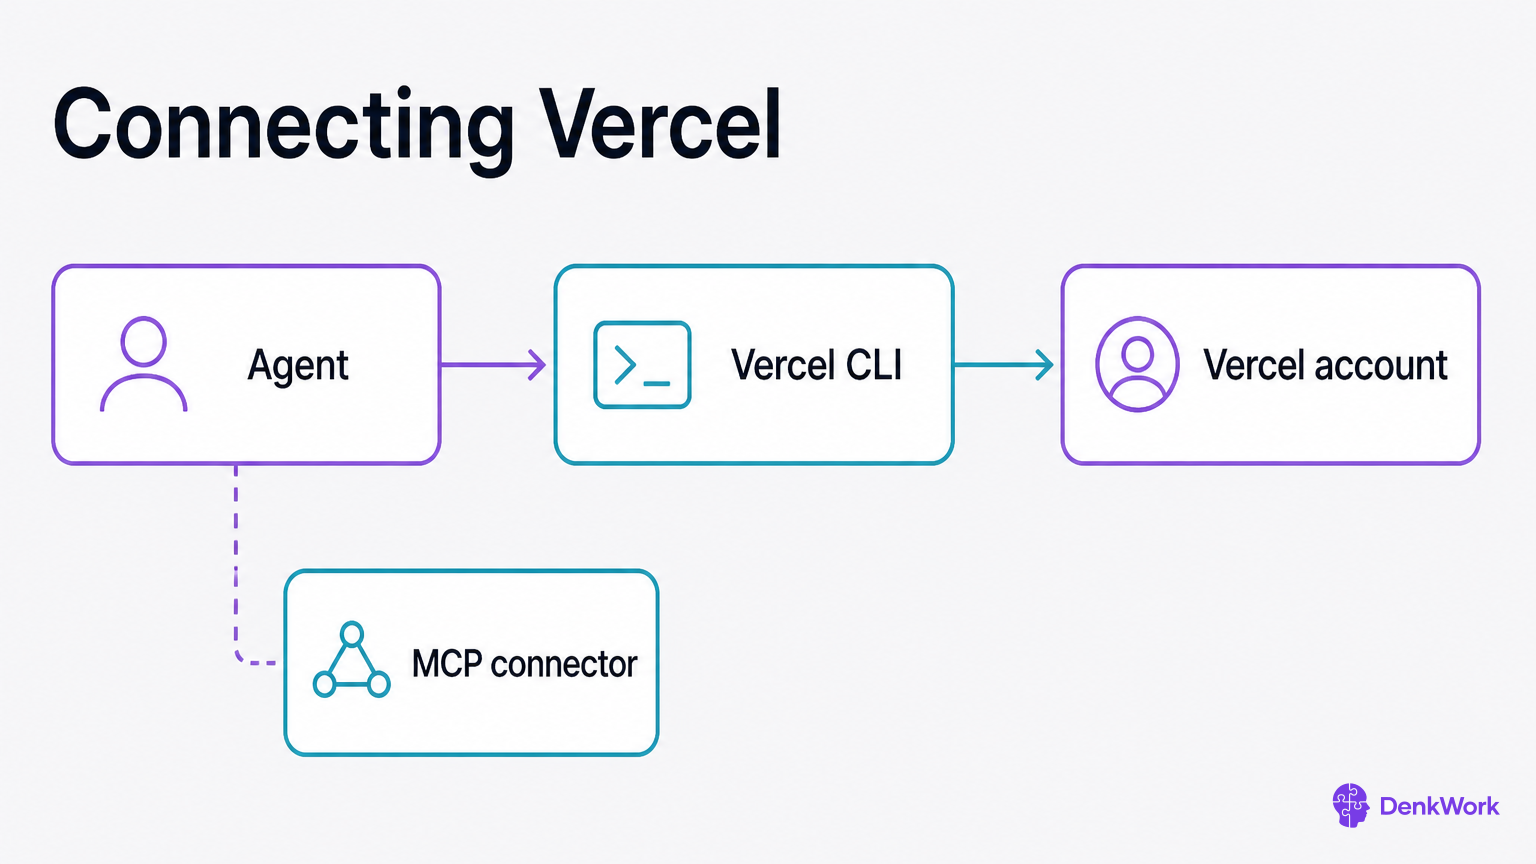
The flow is familiar: the agent installs the Vercel tool, starts login, your browser opens, you pick the account or team, and you approve. There is also an official MCP connector; take it so the agent can ask Vercel for structured status and logs.
If your Vercel account lives under a team, choose that team during approval so the agent can manage that project. You can move a project later, but it is tidier to choose the right place now.
- 1
Paste the Vercel prompt to your agent.
It will install Vercel’s tool and open a browser window to log in.
Vercel loginCheckThe agent reports which Vercel account or team it is linked to.
- 2
Approve access for the right account or team.
Choose your personal account or the team you plan to use, then confirm.
Vercel MCP docsCheckYou see a success page and the agent confirms the MCP connector status.
Install the Vercel CLI if it is not installed. Then sign me in using the standard `vercel login` browser flow.
Request access to manage projects, link a GitHub repository, configure environment variables, and trigger deployments for sites I own.
Tell me which Vercel account or team you connected to.
Then add the official Vercel MCP connector as documented at https://vercel.com/docs/mcp/vercel-mcp so you can query deployments and logs. Let me know if additional approval is needed and guide me through it.
Reply should include the connected account/team and MCP connector status.
Let your agent sign in to Supabase so it can create and change your data.
Connect this now. Your database and your sign-ins both live here, and module 4 starts with your agent creating tables.
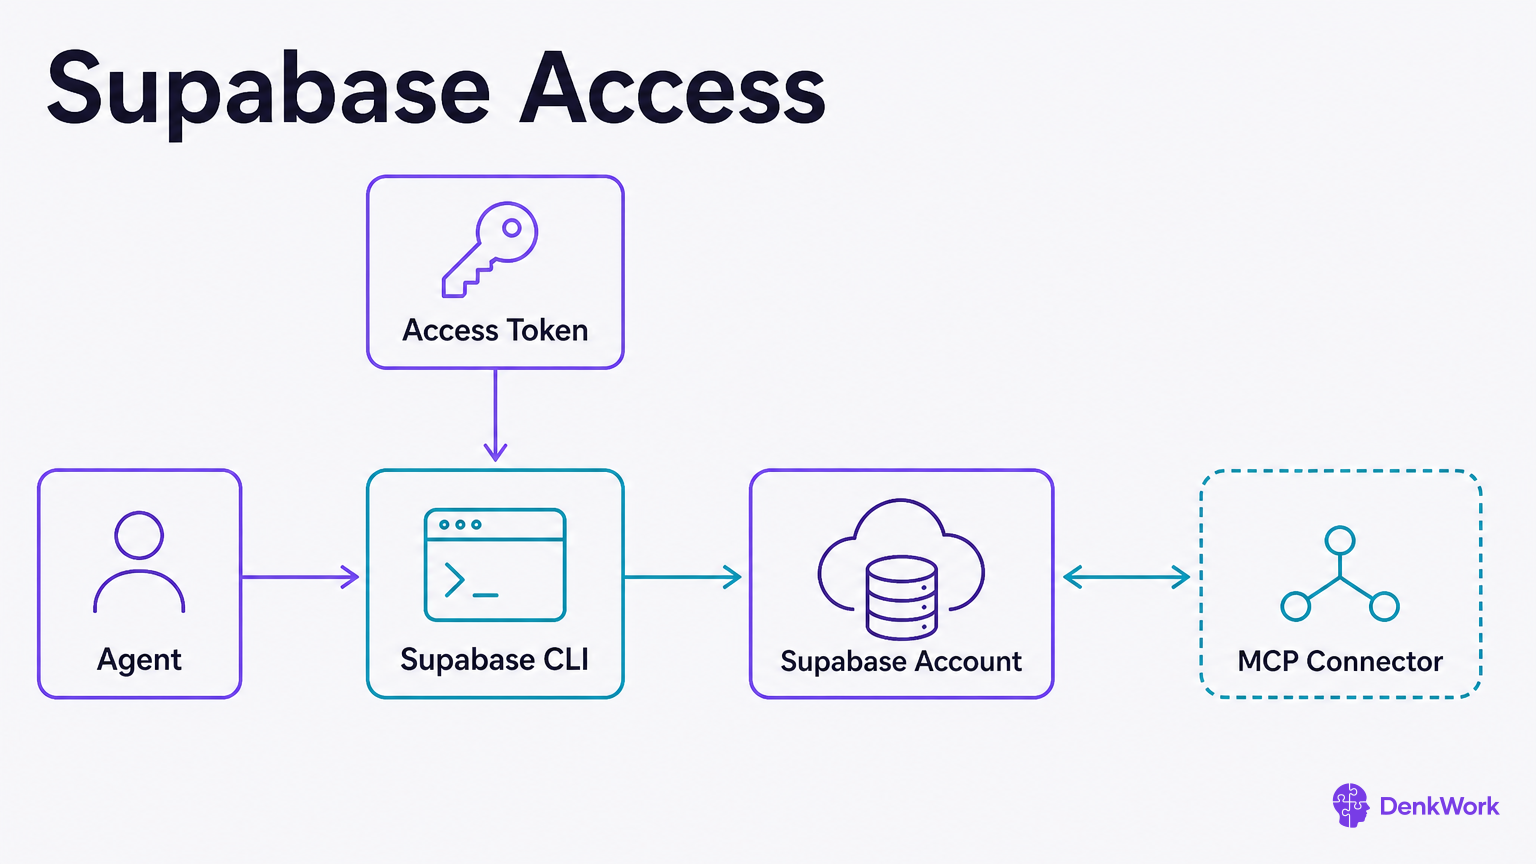
Supabase is where the app stores who signed up and what they saved. The tool here needs an access token you copy from the dashboard once, then the agent stores it safely. That unlocks creating a project, setting database settings, and managing auth providers.
There is an official MCP connector too. Add it so the agent can ask structured questions about projects or tables without scraping pages.
You will copy one token from your Supabase account page. That token is like a spare key: keep it in the agent’s safe place, not in an email or a note.
- 1
Open your Supabase token page.
Sign in and go to Account settings, then Tokens.
Supabase access tokensCheckYou see a page where you can create a Personal Access Token.
- 2
Create a new personal access token.
Name it for this project and copy the value once; you will paste it to the agent.
Supabase accountCheckYou have a token value on your clipboard.
- 3
Paste the Supabase prompt to your agent.
It will ask for the token and finish login, then add the MCP connector.
Supabase MCP guideCheckThe agent confirms which Supabase account it can manage.
Install the Supabase CLI if it is not installed. Start `supabase login` and ask me for the access token. I will paste it here for you to use once.
Configure the CLI to manage my Supabase account and projects: create projects, apply SQL migrations, manage authentication providers, and set environment variables.
Tell me which Supabase account you connected to.
Then add the official Supabase MCP connector from https://supabase.com/docs/guides/getting-started/mcp so you can query project and schema metadata. Confirm when both the CLI and MCP are ready.
Reply should show the account email or org and MCP status.
Let your agent sign in to Expo so it can build the app for your phone.
Only if you are building with React Native, which is what this course uses. Needed in module 3. If you take a different route to the app stores, skip this and connect that route's tools when you get there.
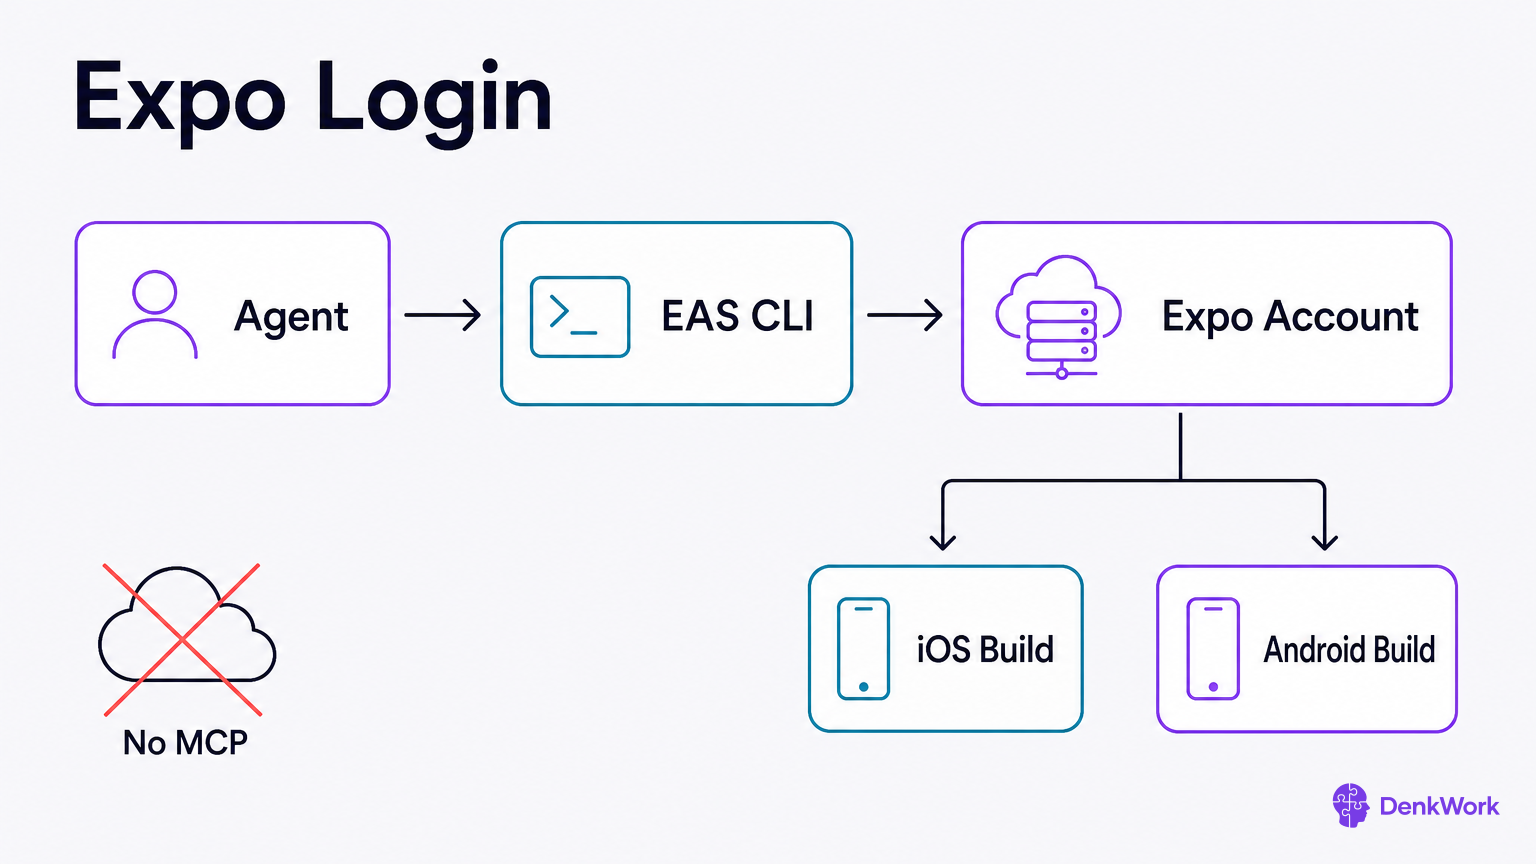
Expo builds your iOS and Android app in the cloud. The tool here is called EAS CLI, and the agent runs it. You sign in with your Expo account through a browser window that opens when the agent starts login.
There is no MCP connector for Expo today. The tool is what matters, because it can create builds, manage credentials, and upload to the stores later.
When the browser asks, pick the Expo account you created earlier. If you later add a team on Expo, the agent can switch to it when needed.
- 1
Paste the Expo prompt to your agent.
It installs EAS CLI and starts login; your browser opens to Expo.
Expo loginCheckThe agent reports which Expo account it is signed in to.
- 2
Approve the Expo sign-in.
Use the account you created earlier; confirm any requested access.
Expo accountCheckYou see a success page and the agent confirms it is logged in.
Install the Expo EAS CLI (package name `eas-cli`) if it is not installed. Then sign me in to my Expo account using the standard browser login flow that EAS provides.
Request access to create builds, manage build profiles, and handle credentials for iOS and Android for projects I own.
Tell me which Expo account you are signed in as when done.
Note: There is no MCP connector for Expo; the EAS CLI is our working interface.
Expect the agent to list the Expo username it connected to.
Give your agent an email key so your app can send messages.
You can leave this until module 5, when your app starts sending email.
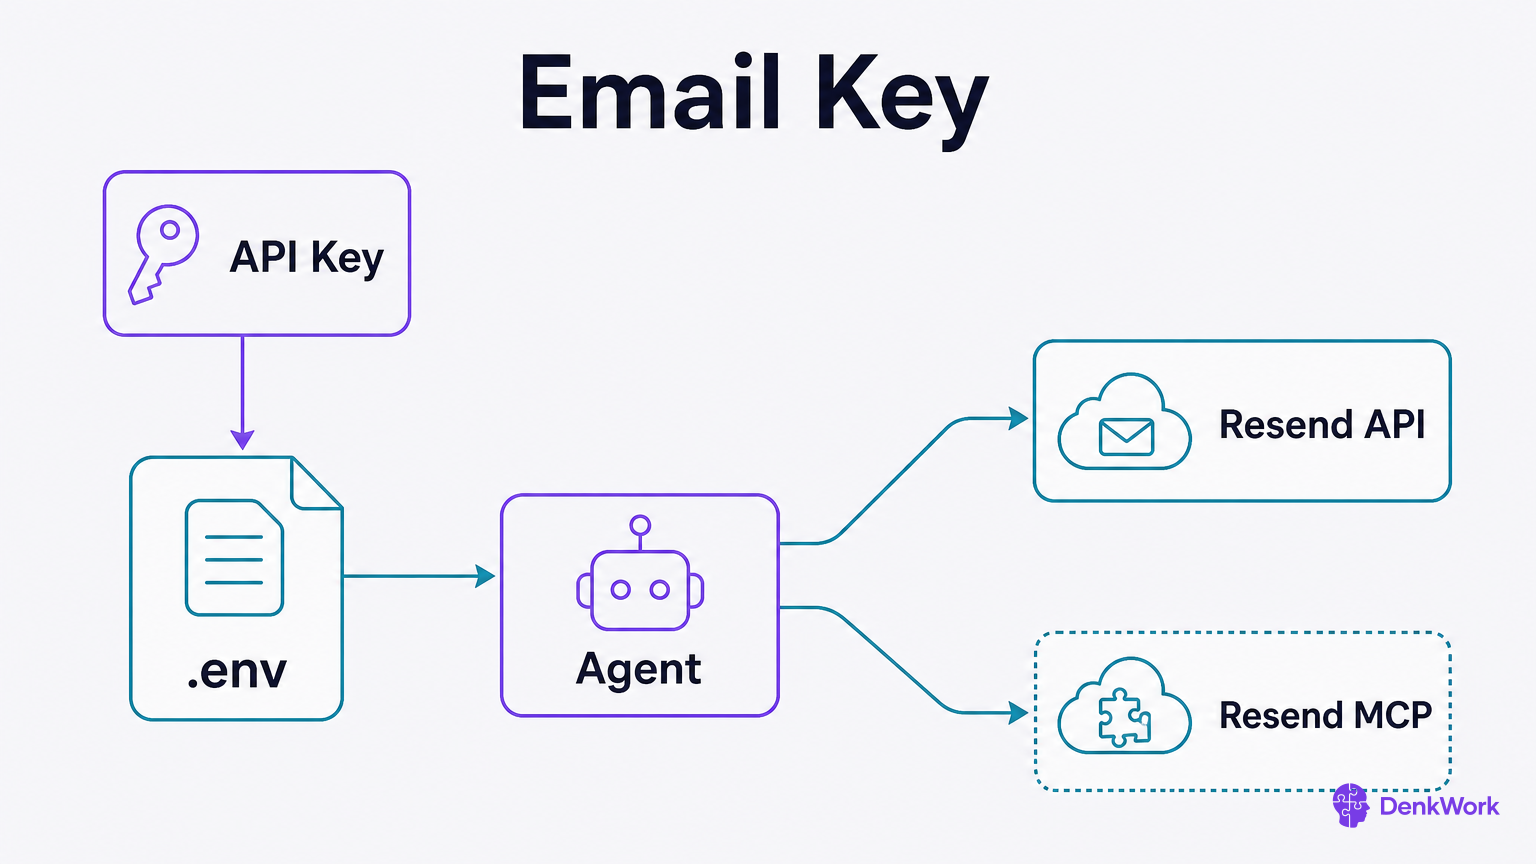
Resend handles transactional email like sign-in codes and receipts. There is no tool to install; you create one API key in the dashboard, and the agent saves it in the project’s secret file.
Resend offers an official MCP connector. Adding it lets the agent check sending status and templates through a structured channel.
You will create a key once, copy it, and paste it to the agent. That is it. Keep the key out of screenshots and notes; it is the same as handing someone a stamped stack of envelopes.
- 1
Open the Resend keys page.
Create a new API key for this project.
Resend API KeysCheckYou have a new key value on your clipboard.
- 2
Paste the Resend prompt to your agent.
It will store the key in .env and add the MCP connector.
Resend MCP docsCheckThe agent confirms the key is saved and MCP is added.
I am going to paste a Resend API key. Store it in the project’s .env file as RESEND_API_KEY, do not print the value back, and confirm it is loaded where the app and deploys can read it.
Then add the official Resend MCP connector (https://resend.com/docs/mcp) configured to use RESEND_API_KEY.
Tell me that the key is stored, and that the MCP connector is working.
Reply should not echo the secret, only confirm presence and connector status.
Add Stripe test keys so your app can take practice payments.
You can leave this until module 8, when you start taking money. Test keys only today either way.
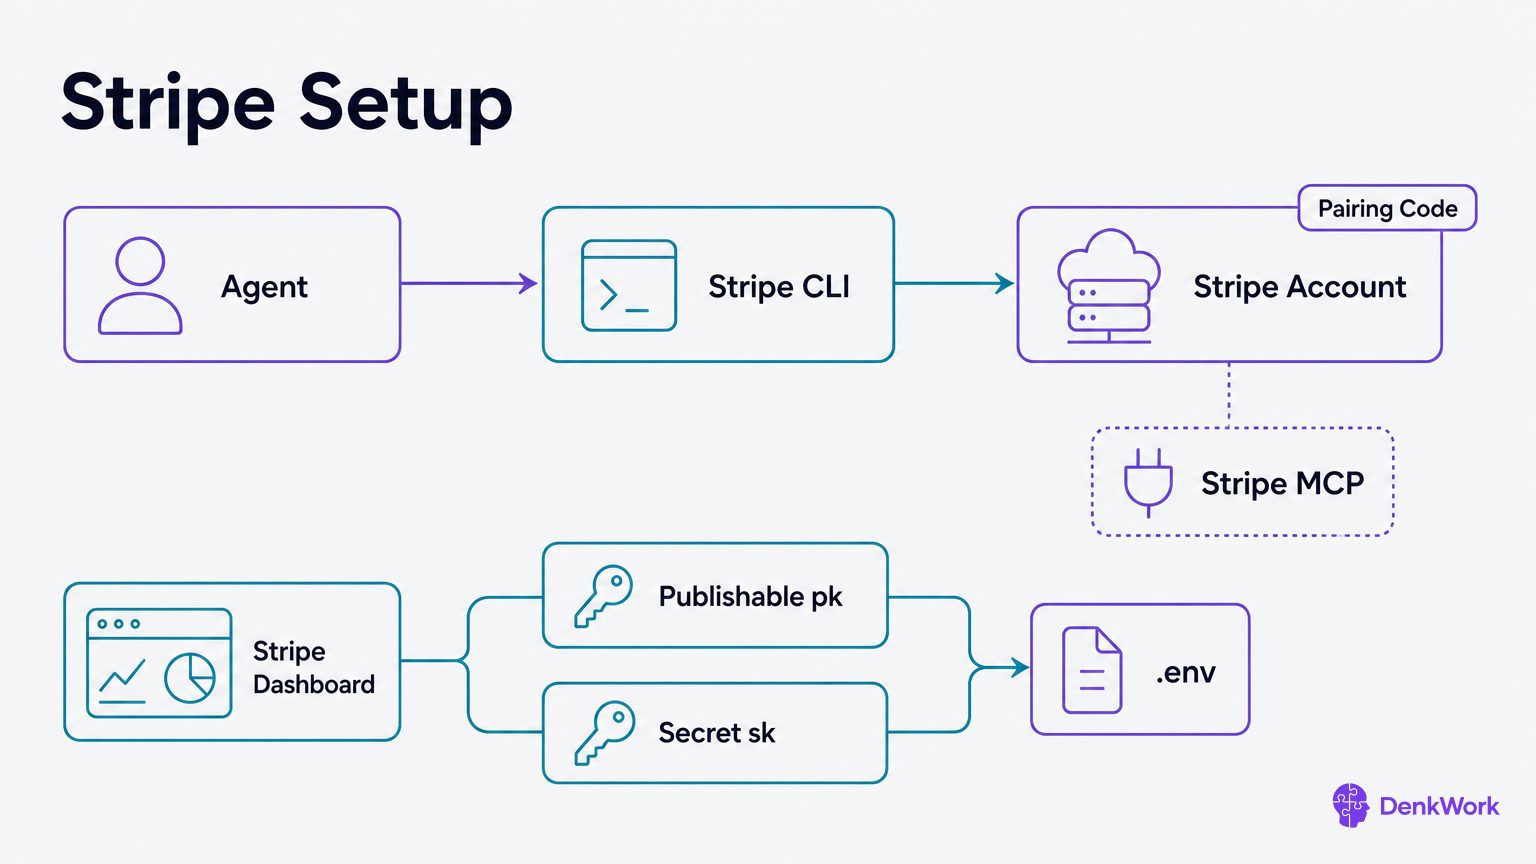
Stripe is for payments. Two pieces connect here. First, your agent signs in with Stripe’s tool using a pairing code that you confirm in the browser. Second, you create TEST keys in the dashboard and the agent saves them in .env for the app itself.
This pays off later when you test checkout without spending money. Use only TEST keys now. Live keys come much later, when your app is ready and your business details are set.
Stripe also has an official MCP connector. Add it so the agent can check customers, prices, and events in a structured way.
- 1
Start Stripe login with your agent.
Paste the prompt; a browser opens to confirm the pairing code.
Stripe loginCheckThe agent reports it is logged in to your Stripe account.
- 2
Open your TEST API keys page.
Copy the test publishable key and the test secret key.
Stripe test API keysCheckYou have both pk_test_... and sk_test_... values.
- 3
Paste the keys to the agent when asked.
It will store them in .env and add the MCP connector.
Stripe MCP docsCheckThe agent confirms keys are saved and MCP is configured.
Install the Stripe CLI if it is not installed. Start `stripe login` to initiate the browser pairing flow. I will confirm the code in the Stripe dashboard.
After you are logged in, prompt me to paste the TEST publishable key and TEST secret key from https://dashboard.stripe.com/test/apikeys. Store them in the project’s .env as STRIPE_PUBLISHABLE_KEY and STRIPE_SECRET_KEY. Do not print the values back.
Then add and configure the official Stripe MCP connector (https://docs.stripe.com/mcp) using the same account so you can inspect customers, prices, and events in test mode.
Tell me which Stripe account you are paired with and confirm that the two test keys are saved and that MCP is working.
Expect account email, test mode noted, and no secret echo.
Test keys vs live keys
Test keys only talk to Stripe’s test data. They let you create customers and payments that look real but never charge a card. Live keys talk to the real payment system. Keep live keys out of this project until you are ready to sell.
Stripe shows which mode you are in at the top of the dashboard. Your agent will keep you in test until the payments module asks you to switch.
Pair Modal with a token so heavy jobs can run off your laptop.
You can leave this until module 7, when you move heavy work off the phone.
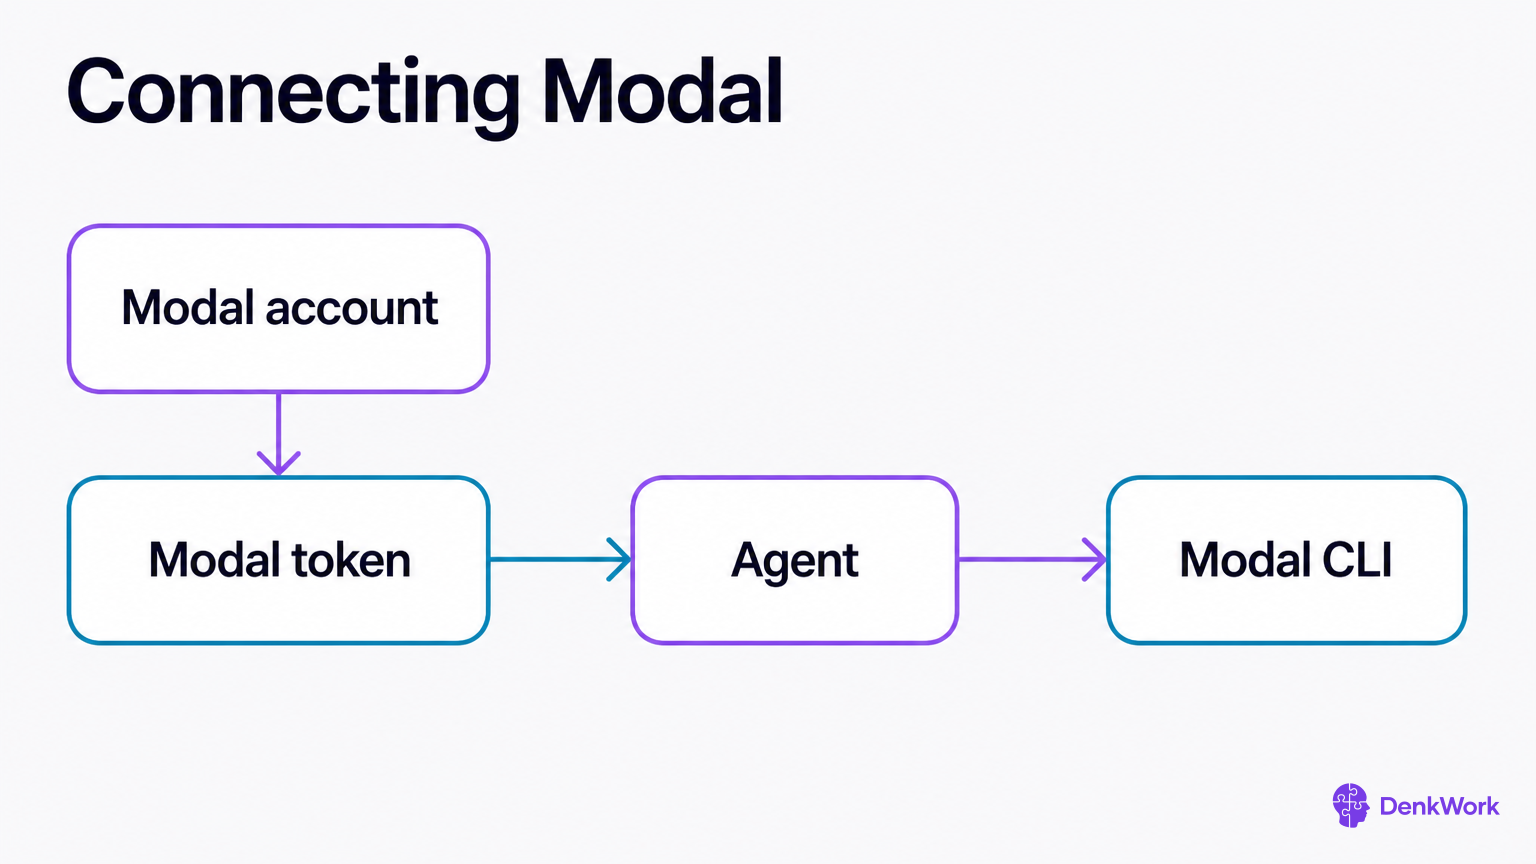
Modal runs server jobs for things your phone should not do, like image processing or long AI tasks. The agent uses a setup command that asks for a token; you can also create a token in the dashboard and paste it once.
There is no MCP connector for Modal. The tool is what matters here, because it can deploy and run jobs on demand.
You will see a one-time token screen. Treat it like the spare key under the mat: pick it up once, hand it to the agent, and then do not leave it lying around.
- 1
Open Modal’s token settings.
Create a new token for this project.
Modal tokensCheckYou have a client token and secret to copy once.
- 2
Paste the Modal prompt to your agent.
It will install the tool, accept the token, and finish setup.
Modal settingsCheckThe agent confirms it can run a small test job.
Install the Modal CLI if it is not installed. Start `modal setup` and prompt me for the token values if needed. I can also paste a newly created token pair from https://modal.com/settings/tokens.
Configure the CLI so you can deploy and run Modal functions for this project. Run a tiny no-op or hello-world task to confirm access.
Tell me which Modal account you are configured against and confirm that a test run succeeded.
Note: There is no MCP connector for Modal; the CLI is our interface.
Look for successful setup and a test run confirmation.
Turn on CodeRabbit for your GitHub repo so reviews appear on pull requests.
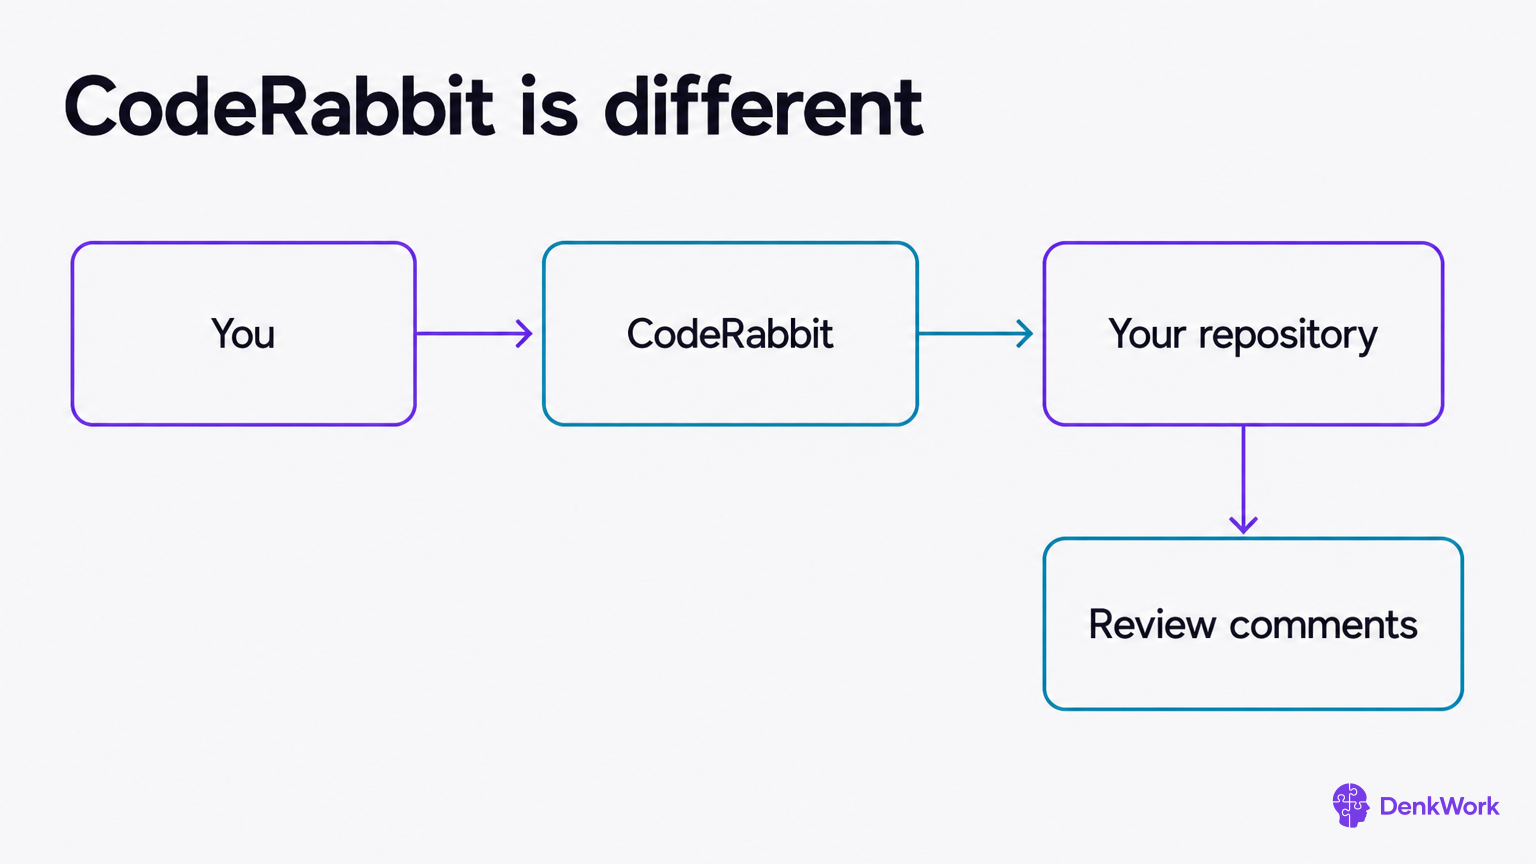
Optional, and not urgent. It reviews your code once other people are touching it. Plenty of people ship without it.
CodeRabbit reviews your pull requests and leaves comments. This one is different: you do not give a key to your agent. You install CodeRabbit on your repository from its own site as a GitHub App.
The flow is all in your browser: click Install, pick the repository, and approve. Once installed, any new pull request will get a review from CodeRabbit without the agent doing anything special.
If you do not see it on a first pull request, open the app’s settings and confirm the repository is selected.
- 1
Open the CodeRabbit GitHub App page.
Click Install and choose the repository you will use.
Install CodeRabbit on GitHubCheckYou see CodeRabbit listed under your repo’s Installed GitHub Apps.
- 2
Sign in to CodeRabbit if asked.
Use your GitHub account to complete setup.
CodeRabbit siteCheckThe CodeRabbit dashboard shows your connected repository.
Keep every secret in one .env file inside your project, not inside the app.
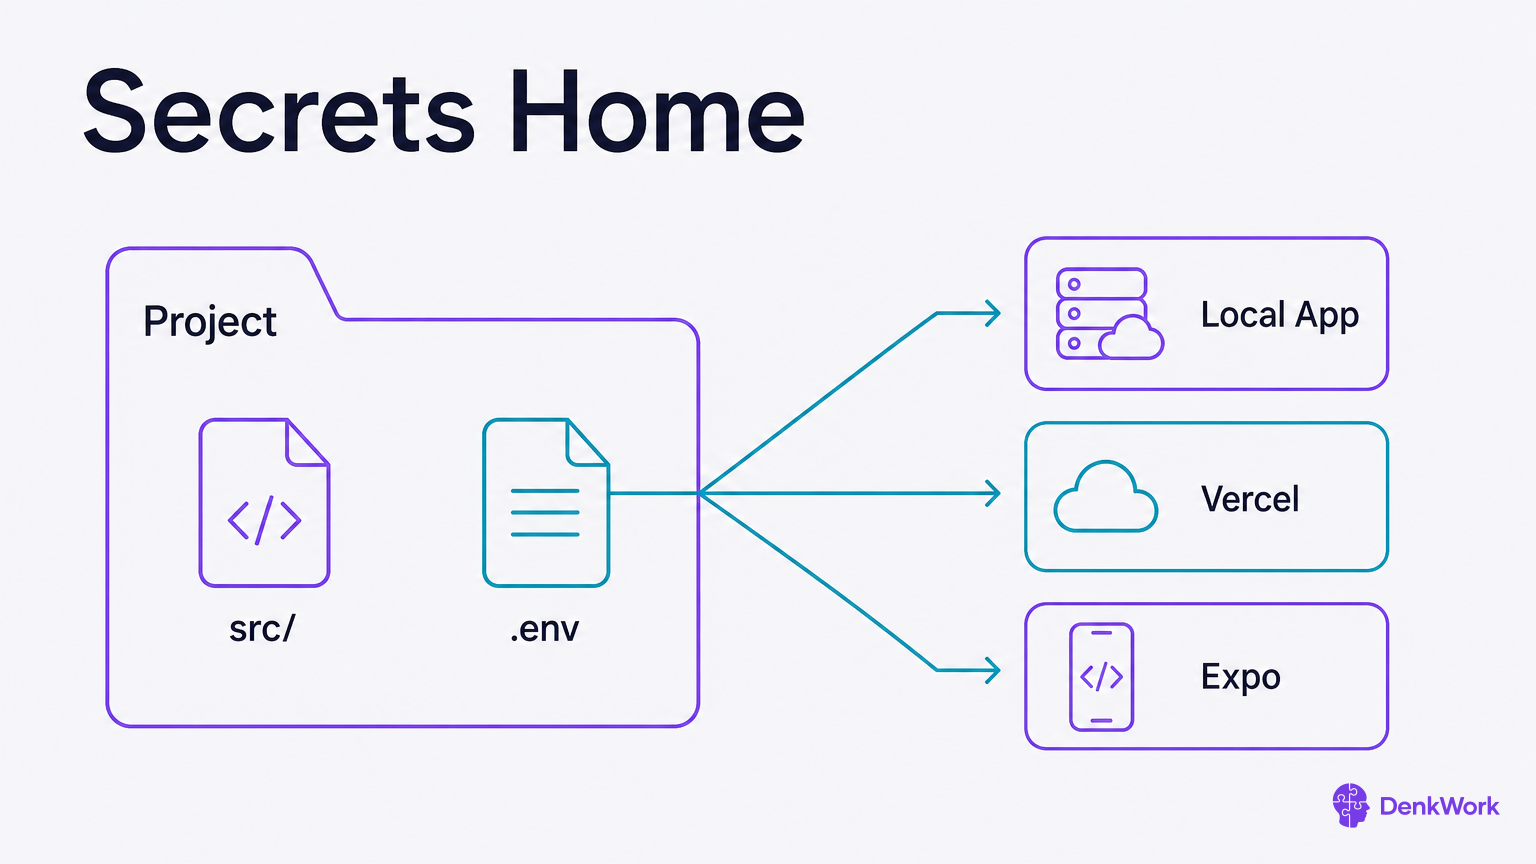
A secret is like a spare key. You would not glue it to the front door. Put it in one place only: a file named .env at the root of your project. The agent writes and reads this for you. You never paste secrets into code files.
The app code reads values like RESEND_API_KEY or STRIPE_SECRET_KEY from .env when running locally, and from the host (Vercel, Modal, Expo) when deployed. The agent will set those host copies later so your builds still have what they need without baking secrets into the app.
If you ever need to move a project, the agent can show you what is in .env and help you re-enter those values into the new place. Keep a secure copy of the values in your password manager, not a sticky note.
Make sure .env is ignored so secrets never leave your machine.
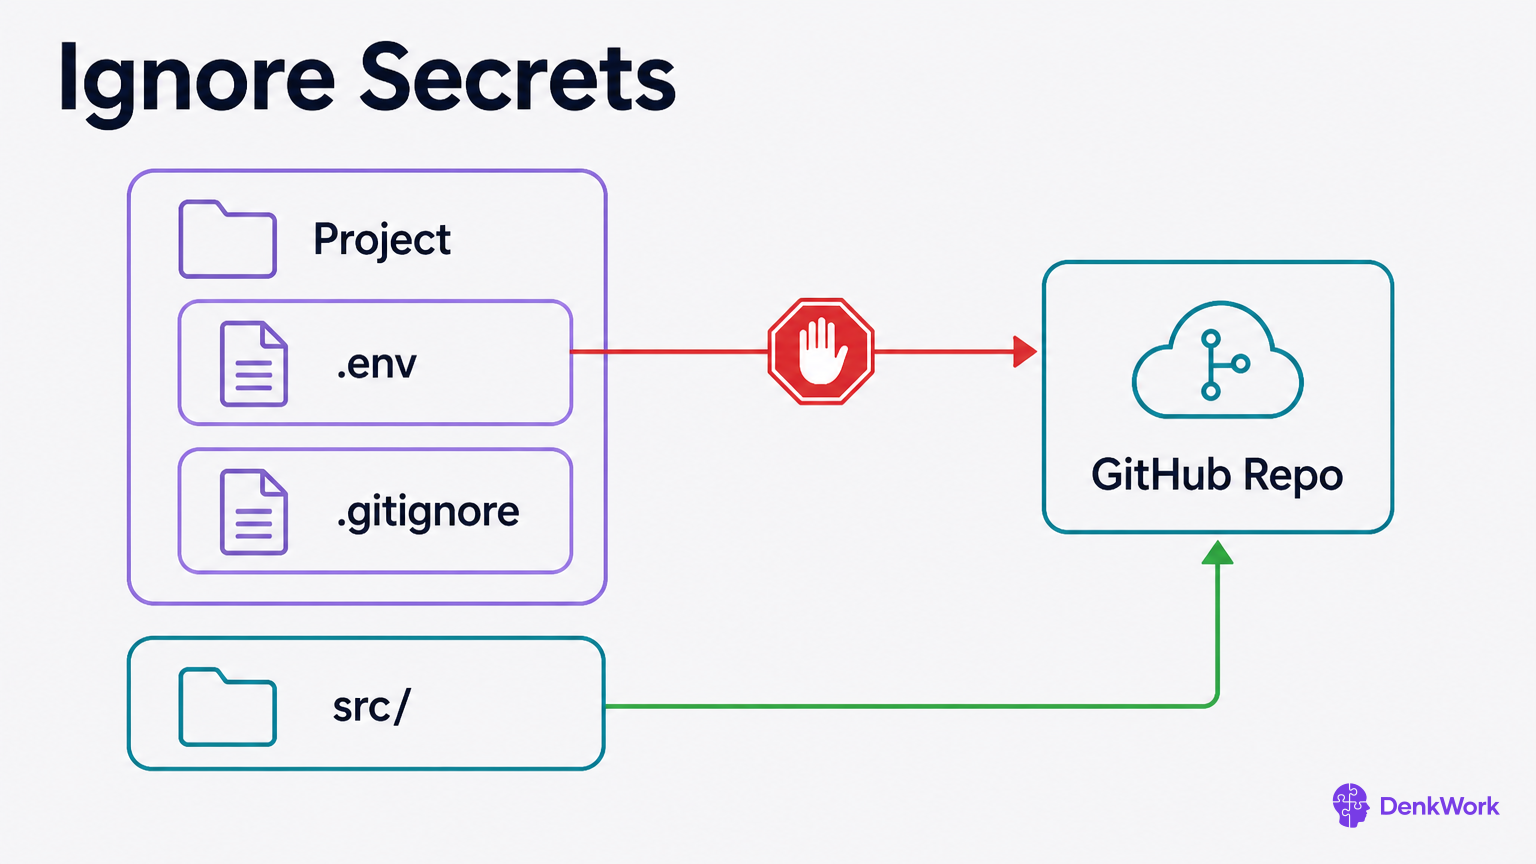
Git ignores files listed in a file named .gitignore. That is the do-not-pack list. .env must be on it, so the agent can use your secrets locally while GitHub never sees them.
Ask the agent to prove it. It will show you the line that keeps .env out and confirm that your last commits did not include it. If anything is wrong, the agent will fix the ignore list and clean any accidental history safely.
- 1
Ask the agent to verify .env is ignored.
Paste the prompt; it will show you the ignore rule and check history.
CheckYou see a line like “.env” in .gitignore and a clear report that .env was never committed.
Confirm that the project’s .env file is not tracked by Git. Show me the exact line in .gitignore that excludes it. Then check the repository history to ensure no commit ever included .env or any secret. If you find a problem, fix it: update .gitignore, remove the file from tracking without deleting it locally, and rewrite history if needed. Explain what you changed in plain words.Expect a quoted .gitignore line and a short, clear safety report.
Revoke the old key, make a new one, and tell the agent.
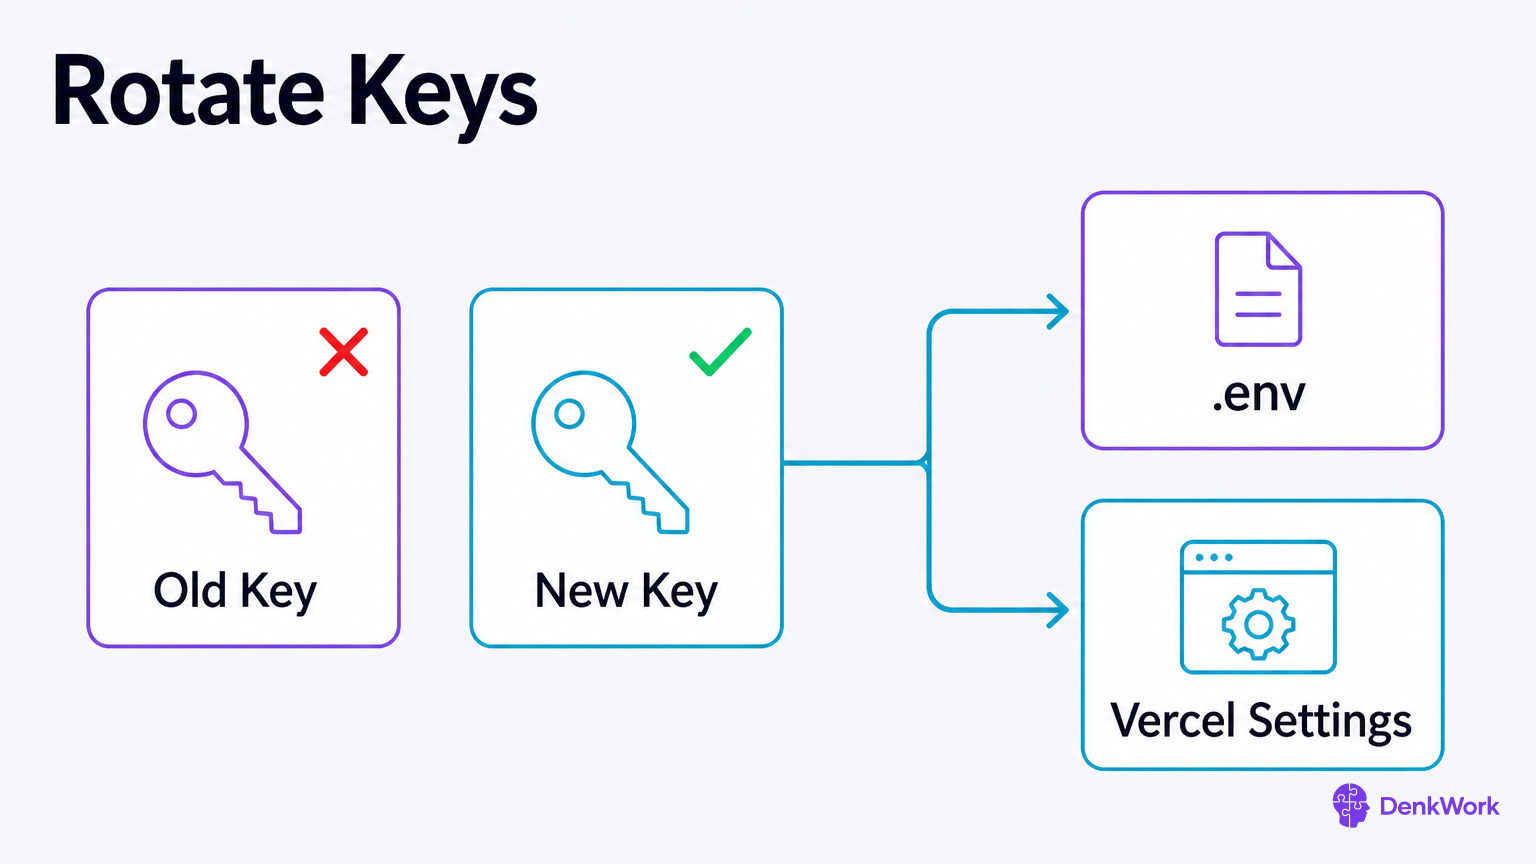
Leaks happen. Treat it like losing a house key. You do not replace the lock; you change the key. Every service gives you a “revoke” or “delete” button for a key and a way to create a fresh one.
You will click revoke in the dashboard, generate a new key, and paste it to the agent so it can update .env and any host settings. That is normal enough that dashboards make it a two-minute job.
- 1
Revoke the exposed key in the service dashboard.
Use the service’s key page to delete or disable the key.
Resend API KeysCheckThe old key no longer appears or is marked revoked.
- 2
Create a replacement key.
Generate a fresh key in the same dashboard.
Stripe test API keysCheckYou have the new value copied.
- 3
Tell the agent to replace the key in all places.
Paste the prompt; it will update .env and any connected hosts.
CheckThe agent reports every target updated and no secrets printed.
I have revoked an old API key. I will paste the new value next. Replace the old value wherever it is stored: in .env locally and in any connected host settings (Vercel project env vars, Expo secrets, Modal config, or MCP connector settings as needed). Do not print the secret back. Confirm each location you updated in a checklist and prompt me if any host needs me to click a button in its dashboard.Expect a checklist of updated locations without echoing the secret.
How fast do I need to act?
If a key is public on GitHub, assume it was copied by bots within minutes. Revoke it as soon as you notice. Most services email you when they detect a key in a public repo; follow that link and rotate the key right away.
If the key only appeared in a private chat or screen share, still rotate it. Rotation is quick and removes doubt.
You will see the letters MCP; it is just a second way your agent reaches a service.
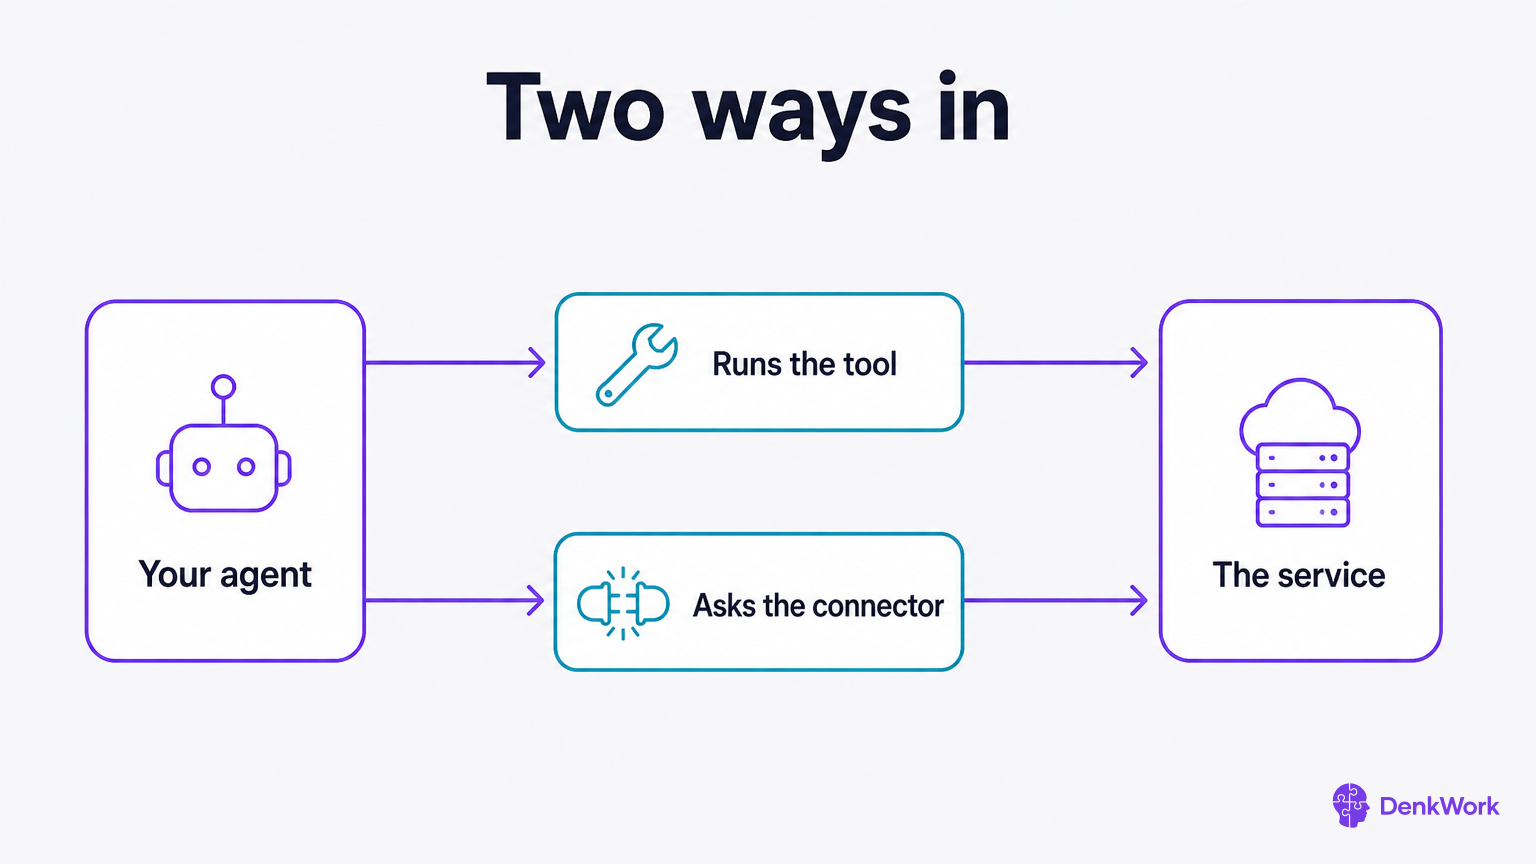
Nothing to do in this section. You will see these three letters in your agent's replies and in other people's advice, and it is easier to meet them here than to wonder later.
A command line tool, or CLI, is a small program your agent runs on your machine, the same one a developer would use. It types a command and reads what comes back. Almost every service has one, and it is what did most of the work in the sections above.
An MCP connector is a direct line between your agent and the service, so it can ask a question and get a clean answer instead of running a program and reading the output. MCP stands for Model Context Protocol. Only some services have built one so far.
Your agent set up whichever were available while you were approving things, and it picks between them on its own. You will not manage either by hand.
Ask your agent to list what it can reach and what is missing.
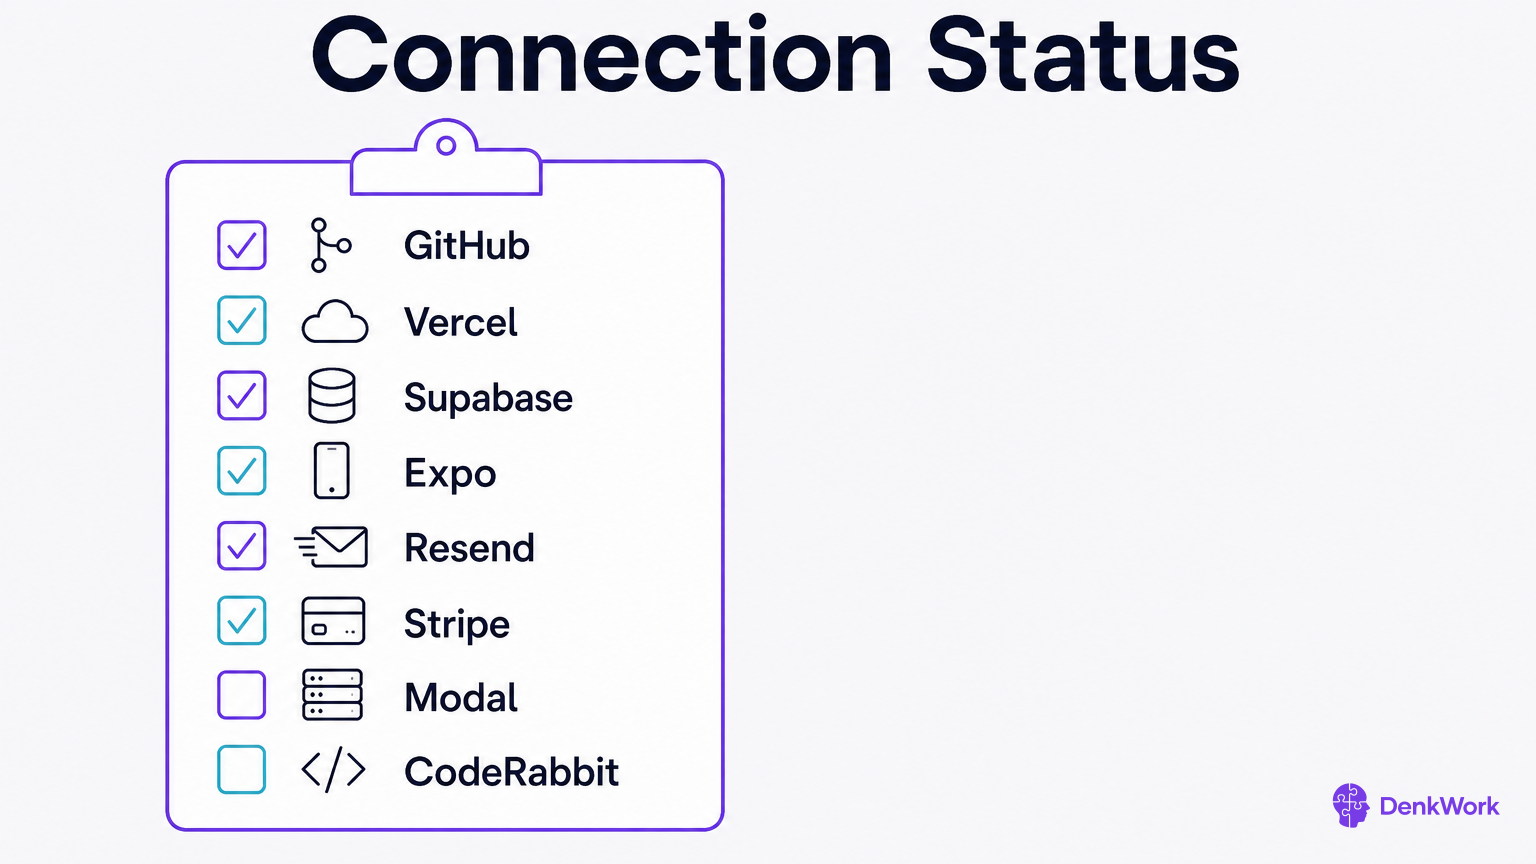
Before moving on, get one clear report. The agent should confirm which accounts it is signed in to and which keys it has stored, then point out any missing pieces and tell you how to finish them.
- 1
Paste the final audit prompt to your agent.
It will verify logins, keys, and connectors, and return a clear status.
CheckYou see a list of services with green checks or specific next steps.
Create a connections report for this project. For each service below, state whether you are connected, how (CLI and/or MCP), and under which account. Then confirm whether any required keys are present in .env and, where relevant, in host settings. If something is missing, list the exact step to fix it.

- GitHub (gh CLI + GitHub MCP)
- Vercel (Vercel CLI + Vercel MCP)
- Supabase (Supabase CLI + Supabase MCP)
- Expo (EAS CLI; no MCP)
- Resend (API key in .env + Resend MCP)
- Stripe (Stripe CLI + TEST keys in .env + Stripe MCP)
- Modal (Modal CLI with token; no MCP)
- CodeRabbit (GitHub App on repository)

Return your report as a short checklist in plain English.
Expect a per-service status with accounts named and gaps called out.