Open your accounts
You are about to open the online accounts your app leans on every day. This is the address book for your project: where code lives, where data is stored, how email and payments work, and where your app ships. We will say what each service is for, what it costs, and help you decide what to open now versus later.
- Create a GitHub account with a solid username and two-factor on
- Sign up for hosting, build, and code review tools
- Open accounts for data, background jobs, email, and payments
- Decide when to start Apple and Google store enrollment and begin if needed
You need a handful of online accounts to run your app.
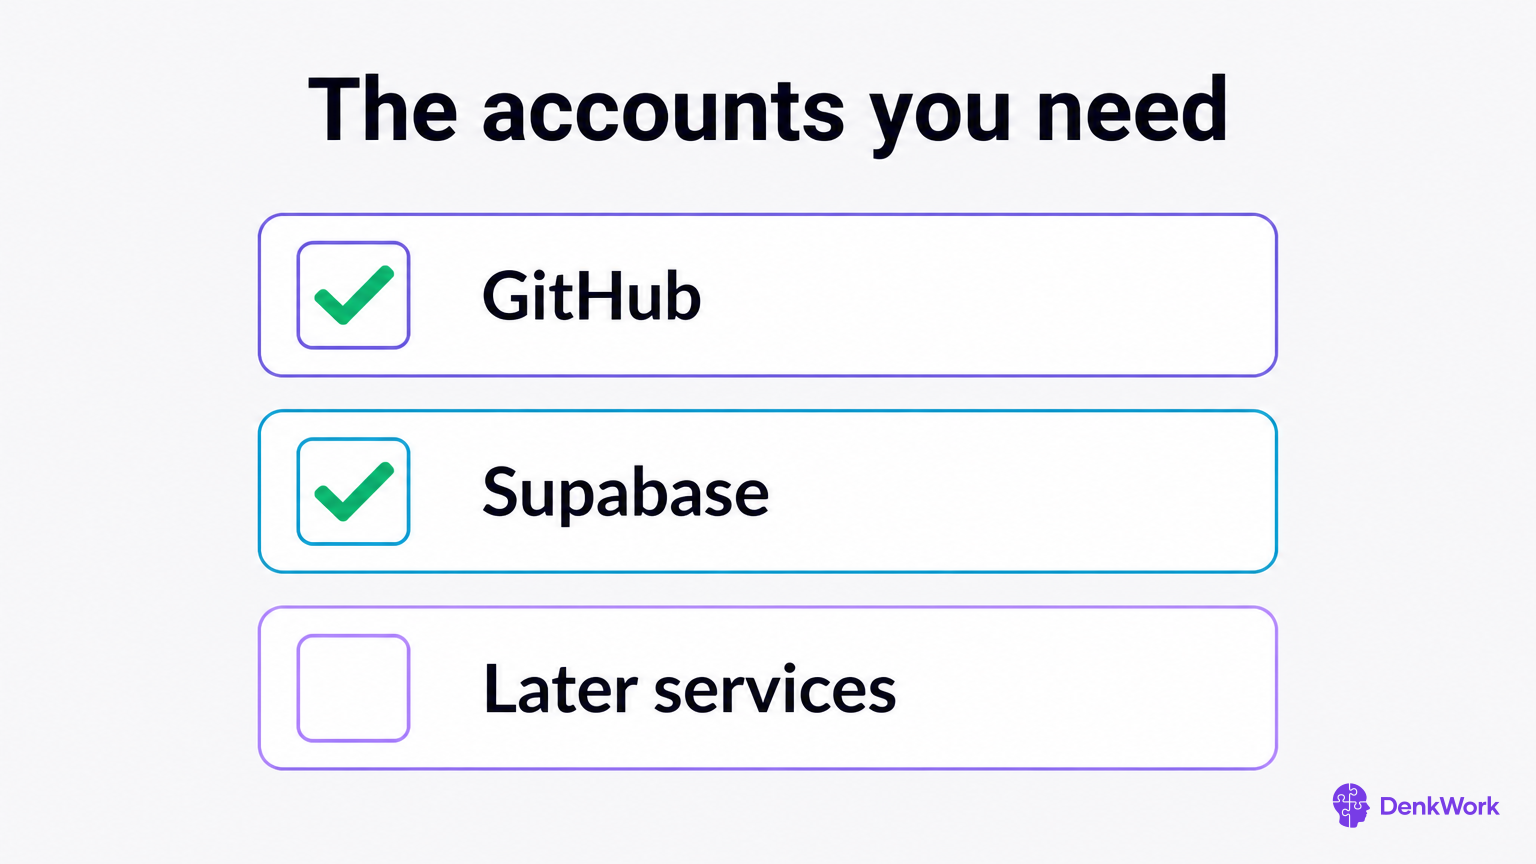
These are the services this course uses. Only the first two matter today. Everything else can wait until the module that needs it, and one of them is a nice-to-have you may never bother with. Opening them all now is fine if you would rather get the admin over with.
Open these today
- GitHub: an online home for your project, where every version is kept. Free for private repositories.
- Supabase: where your app remembers things and logs people in. Free tier to start, paid as your data and traffic grow.
Open these when you reach the module that uses them
- Modal: runs heavy or slow jobs off the phone, like reading a receipt. Free tier to test, then pay for what you use. Needed in module 7.
- Stripe: charges cards and sends the money to you. No monthly fee, a cut of each charge. Needed in module 8.
- Resend: sends sign-up emails, password resets and receipts. Free tier to try, paid by volume. Needed in module 5.
- Vercel: hosts your marketing site. Free hobby tier. Needed in module 6.
- Expo: builds and tests your app on a phone. Free account, paid build minutes if you build often. Needed in module 3, and only if you build with React Native.
Optional, whenever you like
- CodeRabbit: reviews your pull requests and comments like a careful teammate. Paid after a trial. Genuinely optional, and worth it once other people touch your code.
Only when you are ready to publish, and both cost money
- Apple Developer Program: required to publish on the App Store. 99 USD a year.
- Google Play Console: required to publish on Google Play. 25 USD once.
Most of these let you sign up with an account you already have instead of inventing another password. Sign in with Google is the one most people already have and the quickest way through a form. Sign in with GitHub is worth choosing for the developer tools, Vercel, Supabase and Expo, because those services then already know which GitHub account is yours and the next lesson has less to do.
Whichever you pick, use the same one everywhere. Signing up to Vercel with Google and Supabase with GitHub is how people end up locked out of their own project six weeks later, staring at an account they cannot remember creating.
GitHub is your project’s online home.
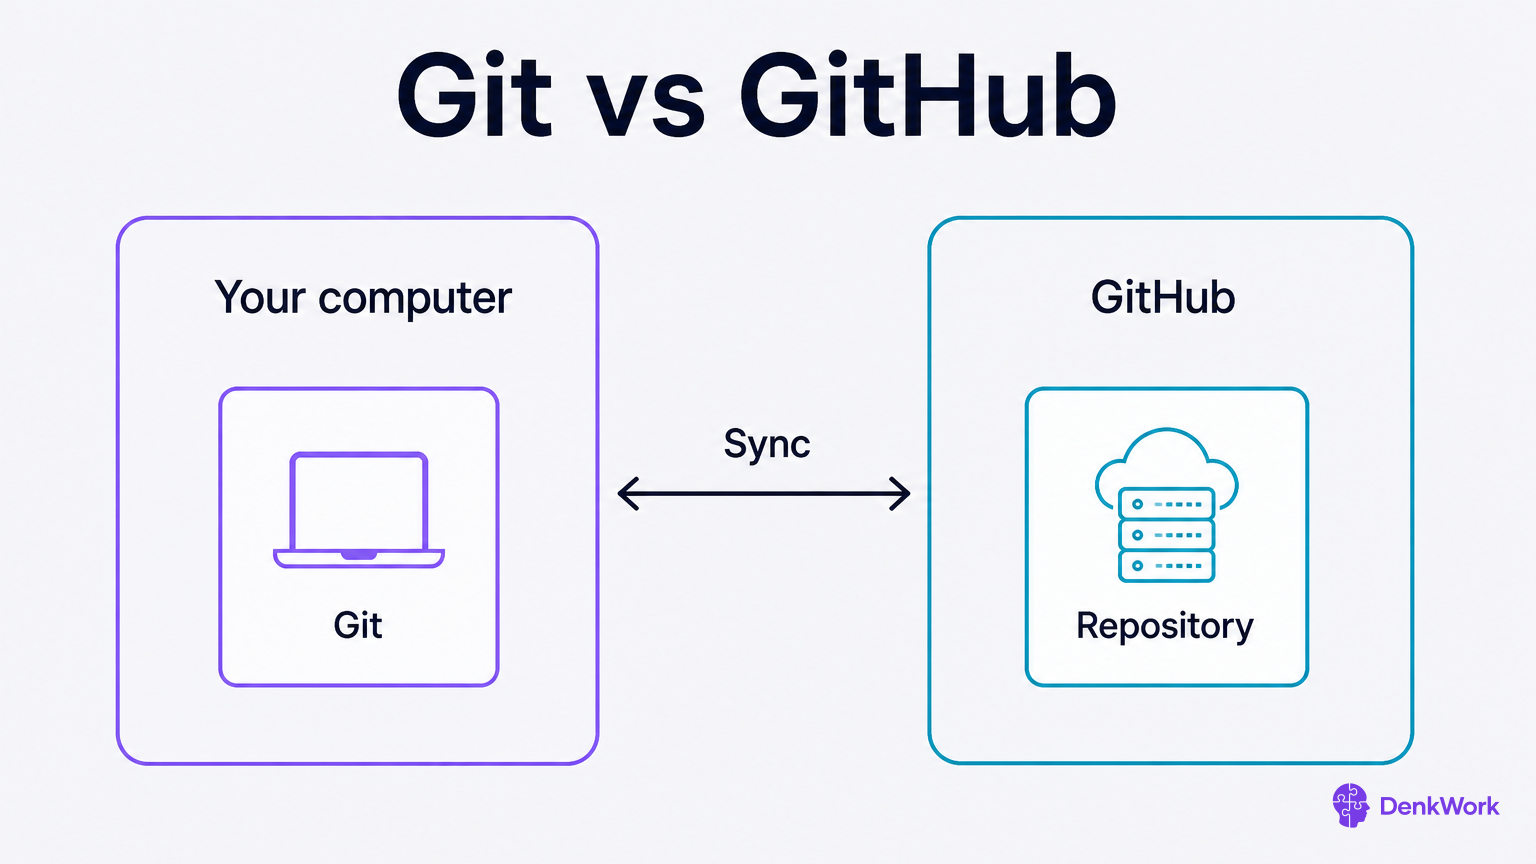
Think of GitHub like a cloud filing cabinet with an endless undo button. It holds your project and every change you make to it, so a bad day is never a lost day.
Git takes the snapshots on your computer. GitHub stores those snapshots on the web. You need both, and today you are opening the web side.
Pick a username you can put on a CV. You will see it often, and so will other people. No jokes you will outgrow.
Turn on two-factor authentication now. It adds a one-time code to your login, which stops most account theft. Doing it today saves pain later, because some tools require it.
One project lives in one repository, often shortened to repo. Make new repos private by default while you are learning, so you choose what goes public and when.
GitHub is free for private repos. Paid plans are for teams and advanced features, which you do not need to start.
- 1
Create your GitHub account
Use your real name and a professional username. Keep the email you will use for other tools.
Sign up for GitHubCheckYou land on your GitHub dashboard and see your profile avatar.
- 2
Enable two-factor authentication
Open your profile avatar > Settings > Password and authentication, and turn on 2FA with an authenticator app.
CheckGitHub shows 'Two-factor status: Enabled'.
- 3
Set new repositories to private
Go to Settings > Repositories and set Default repository visibility to Private.
CheckThe setting shows Private as the default.
These services help you test, deploy, and get code feedback.
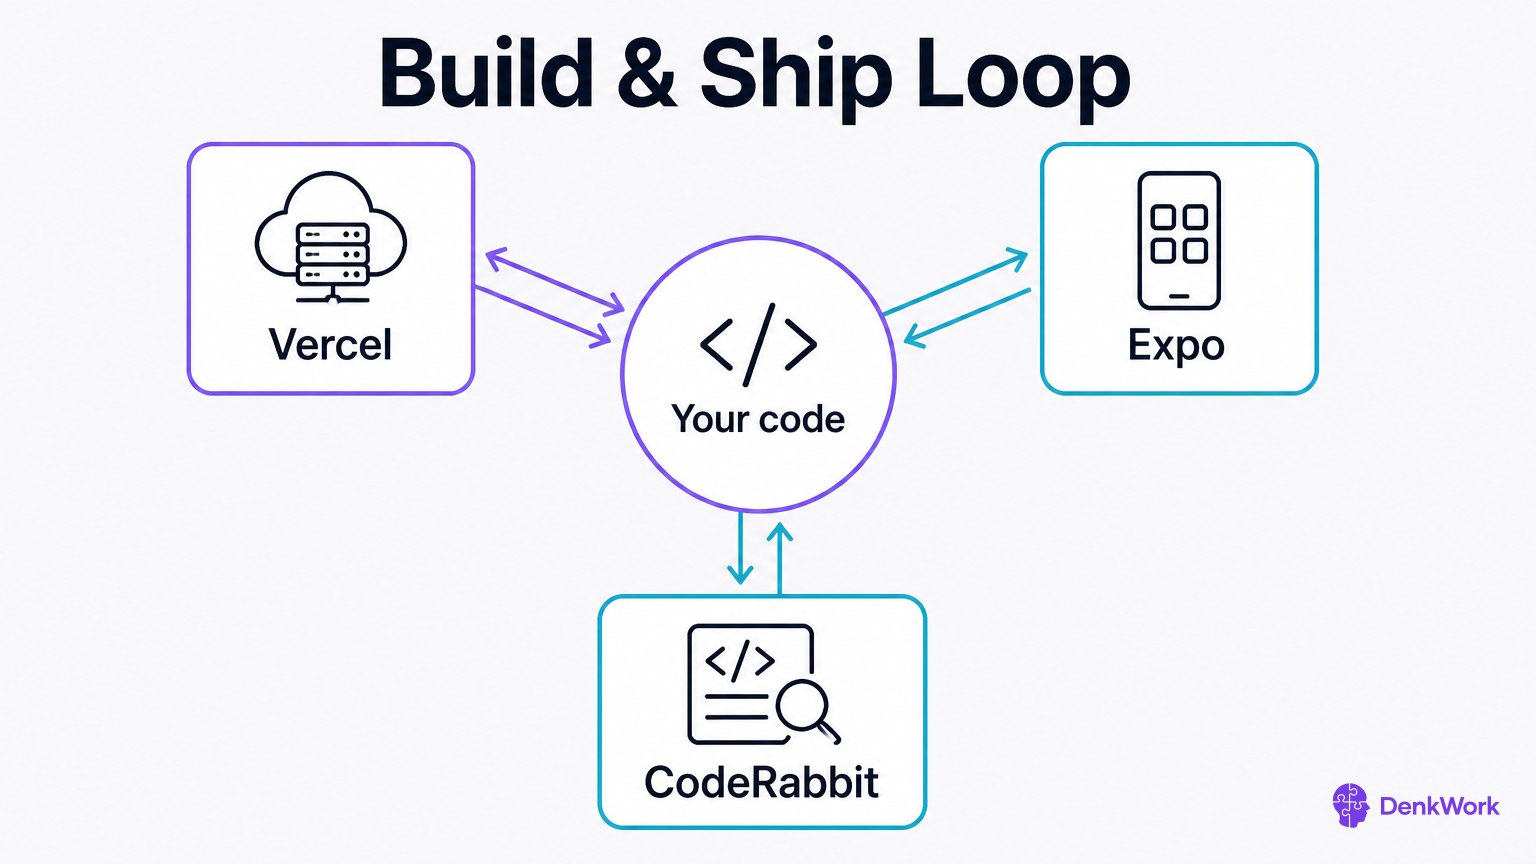
Vercel hosts your marketing site and any small web companion your app needs. It can connect straight to GitHub, so updates go live when you merge code. Cost: free to start; team plans add speed and features.
Expo gives you an account for their build and testing tools, so you can run your app on a phone without wrestling with local setup. Cost: free account; paid build minutes and extras when you need them.
CodeRabbit reviews your pull requests and leaves comments like a careful teammate. It points out bugs and style issues before they reach users. Cost: paid after a trial; check their site for current pricing.
All three offer sign-up with Google or with GitHub. Use whichever you picked earlier, and use it for all of them. For these three in particular, GitHub has a small edge: they can see your repositories straight away.
- 1
Create your Vercel account
Choose Continue with GitHub when offered, and approve access.
Sign up for VercelCheckYou see a Vercel dashboard with your GitHub identity shown.
- 2
Create your Expo account
Sign up with email or Apple. Use the same email you used for GitHub if you can.
Sign up for ExpoCheckYou see your Expo profile page after confirming your email.
- 3
Create your CodeRabbit account
Sign in with GitHub so it can review your pull requests later. You do not need to install it on a repo yet.
Open CodeRabbitCheckYou reach a CodeRabbit dashboard tied to your GitHub account.
These handle your data, background work, and email.
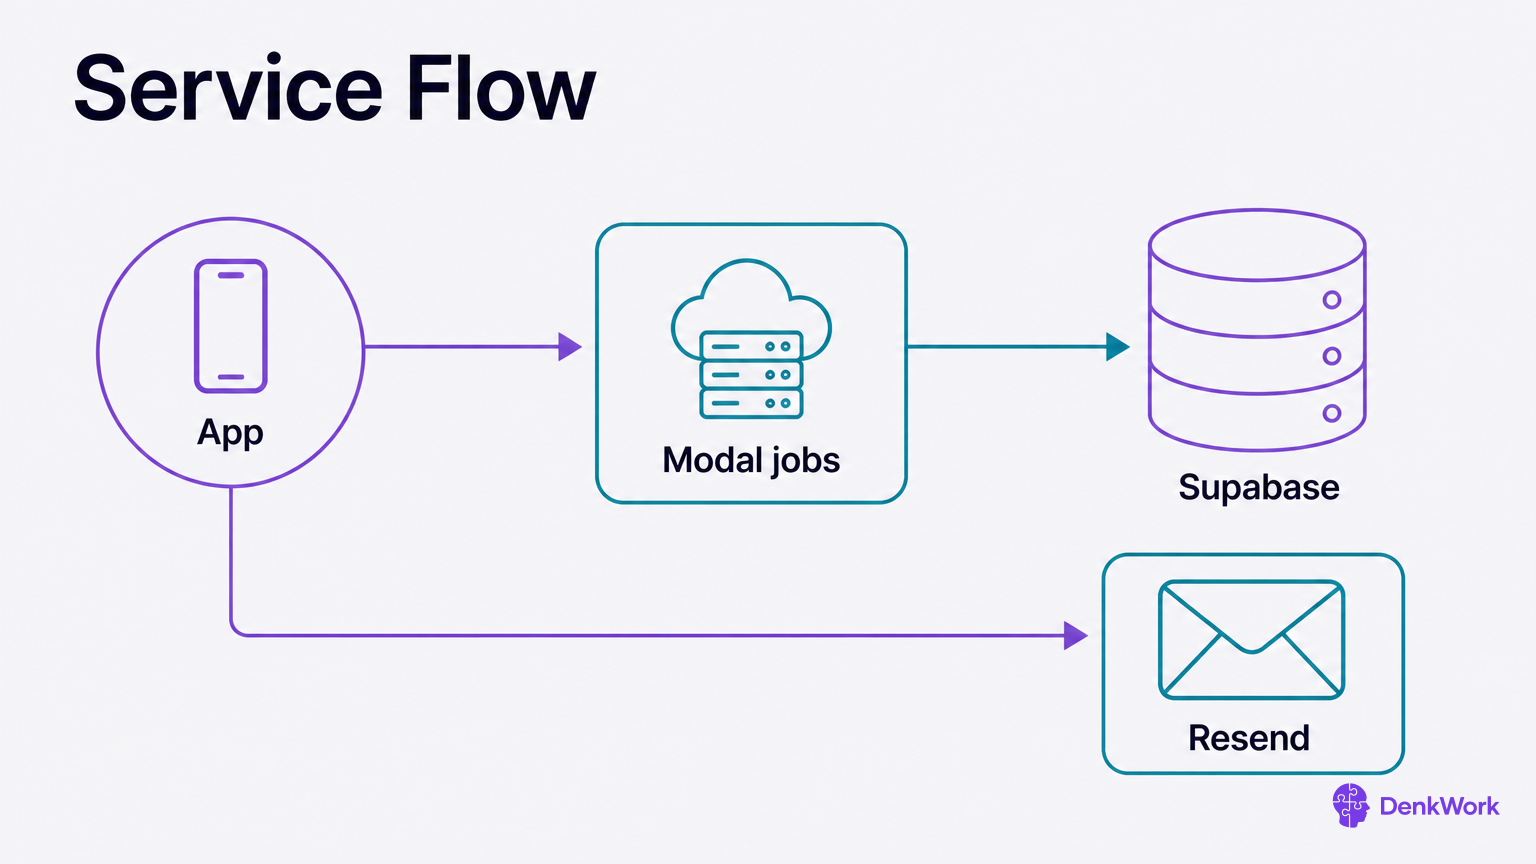
Supabase is where your app keeps what it must remember: user accounts, saved items, and settings. It also handles logging people in. Cost: a free tier to start; paid plans when your data and traffic grow. Sign up with Google or GitHub, whichever you chose for everything else.
Modal runs slow or heavy work away from the phone, like reading a receipt image or generating a report. Cost: free tier with limits; pay for what you use beyond that.
Resend sends the routine messages your app needs: welcome emails, magic links, password resets, and receipts. Cost: free tier to try; paid plans by email volume.
You will create API keys and connect these to your agent in the next setup step. Today you are opening the accounts and confirming you can sign in.
- 1
Create your Supabase account
Choose Continue with GitHub when offered to keep things linked.
Sign up for SupabaseCheckYou see the Supabase dashboard with a profile menu.
- 2
Create your Modal account
Sign up with email and verify it. Keep the same email as GitHub if possible.
Sign up for ModalCheckYou reach a Modal dashboard that shows you are signed in.
- 3
Create your Resend account
Sign up and confirm your email address.
Sign up for ResendCheckYou see a Resend dashboard with your workspace name.
Can I switch these later?
You can move from one provider to another, but it is not free time. Data needs migrating, and code that talks to one service rarely plugs into the next without work. Start with these defaults. They are proven, well-documented, and friendly to small apps.
If you must switch later, plan it as its own task. The agent can help with scripts and one-off jobs to move data.
Stripe charges your customers and sends money to you.
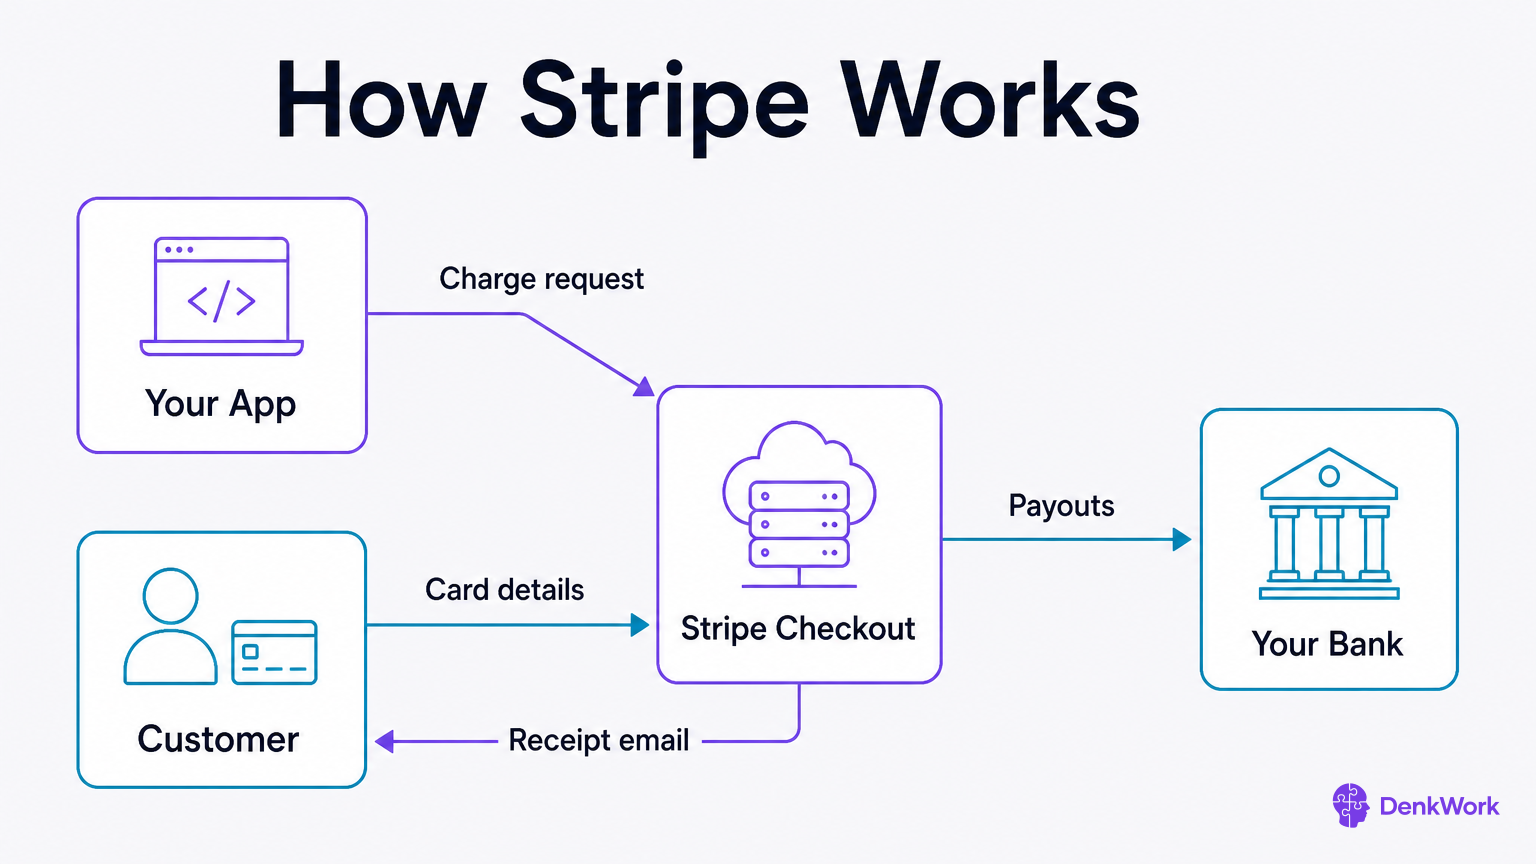
Stripe is the checkout counter for your app. It handles card details, sends receipts, and moves funds to your bank. You do not store card numbers yourself, which keeps you safer.
There is no monthly fee. Stripe takes a cut of each successful charge. The exact rates depend on card type and country, and they are listed in your Stripe dashboard.
Sign up now so testing is easy. Your account will start in test mode. You can create test products and fake charges without money moving.
To accept real money, Stripe will ask for identity and business details. That verification can take time, but you do not need it to build and test.
Turn on two-factor here as well. Payments attract attackers. A one-time code blocks most of them.
- 1
Create your Stripe account
Use your legal name and a reachable email. Choose Individual or Company to match how you will sell.
Sign up for StripeCheckYou land on the Stripe dashboard in test mode.
- 2
Enable two-factor authentication
Open Settings > User settings > Two-step authentication and add an authenticator app.
CheckStripe shows that two-step authentication is active.
Do I need a company today?
No. You can start a Stripe account as an individual and switch to a company later. The change requires new verification, and Stripe may recheck your bank details. Plan a short pause when you make that switch.
If you already have a company and bank account, sign up that way from day one to avoid rework.
Store accounts cost money and take time, so choose when to start.
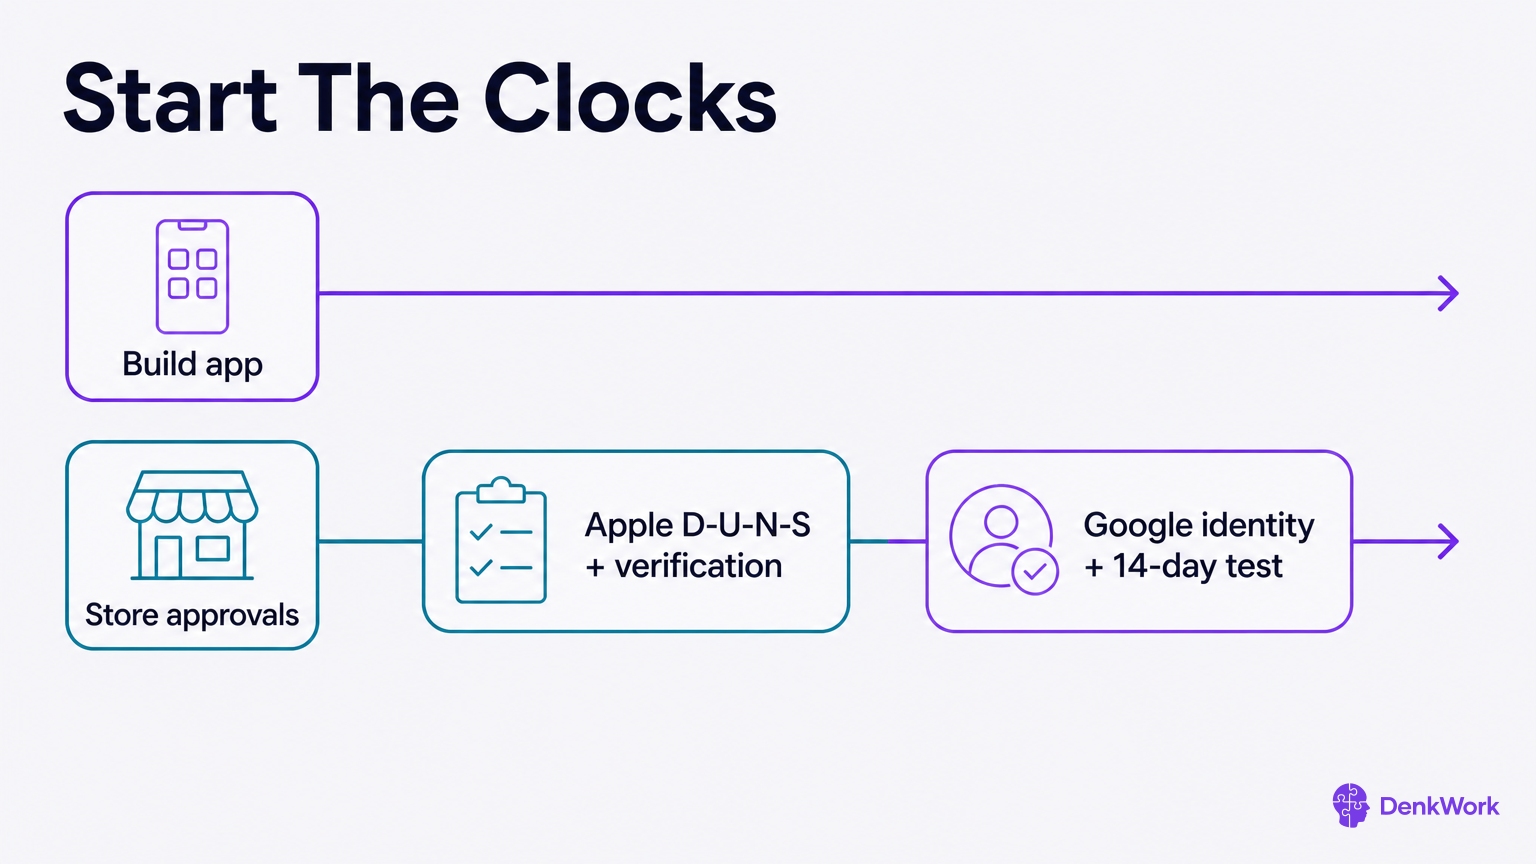
Apple Developer Program costs 99 USD a year. For an individual, enrollment is usually quick. For a company or other organization, Apple requires a D-U-N-S number from Dun & Bradstreet. Getting that number is free and can take days. Apple then verifies your legal entity. If you plan to ship under a company name, start this early.
Google Play Console is a 25 USD one-time fee. Google now verifies every new developer’s identity, which also takes time.
One rule trips people up: a personal Google Play developer account created after 13 November 2023 must run a closed test with at least 12 testers, opted in continuously for at least 14 days, before you can release to production.
Honest options:
- No rush: skip both today and return in the shipping module.
- Want to ship fast: start both now, even before the app exists. The clocks run while you build.
- Shipping under a company: start Apple’s D-U-N-S step today, whatever else you decide.
- 1
If shipping as a company, request or check your D-U-N-S number
Use Apple’s support page to look up or request a D-U-N-S number for your legal entity.
Apple D-U-N-S infoCheckYou have a D-U-N-S number or have submitted the free request.
- 2
Option A: Enroll in Apple Developer Program now
If you want the fastest ship date, begin enrollment now. Choose Individual or Organization to match your plan.
Enroll in Apple Developer ProgramCheckYou receive confirmation that your enrollment is in progress or complete.
- 3
Option B: Create your Google Play Console now
Start the signup and identity check so the 14-day test can happen on your schedule.
Sign up for Google Play ConsoleCheckYou reach the Play Console and see verification steps or the dashboard.
- 4
Option C: Defer both until later
If you are not in a hurry, skip these for now. Make a calendar note for the shipping module.
CheckYou have a dated reminder to return and enroll before release.